Design of lattice girders based on EN 1993-1-1 standard
Software version: ConSteel 17 Build 3303
Keywords: Modeling; Analysis; Design; Lattice girder; Getting started;
Model examples
Design objective, choice of design standard
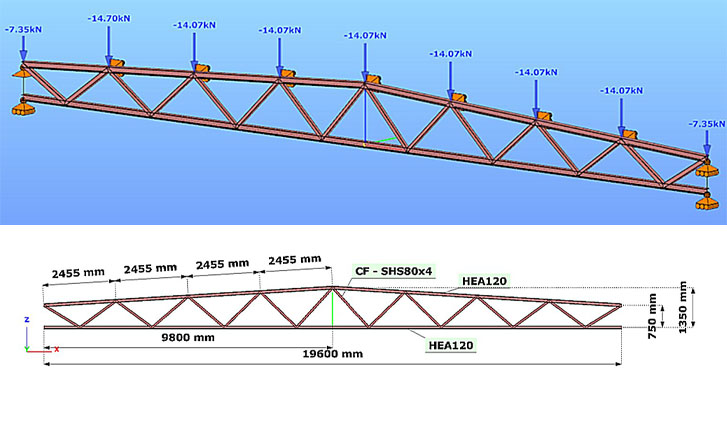
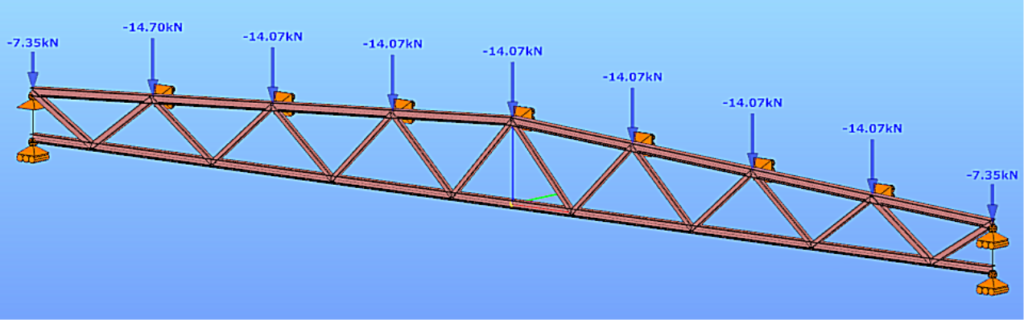
This design guide is intended for novice ConSteel 17 users and provides a step-by-step guide for designing a simply supported lattice girder. The geometry of the lattice girder to be designed is known from the architectural conceptual design, (Figure 1). According to the concept, the lattice girder chords are made of hot-rolled sections of HEA120, while the lattice bars are made of cold-formed SHS80x4 sections. The design of the connections is not included in this guide.
")
(based on conceptual design)
It is well known that structural design is always carried out according to a certain standard or its version. The selection of the standard can be made from the Design Standard menu when creating a new model in the Project Center, or it can be modified later in the Standards tab [S1] selection panel (Figure 2).
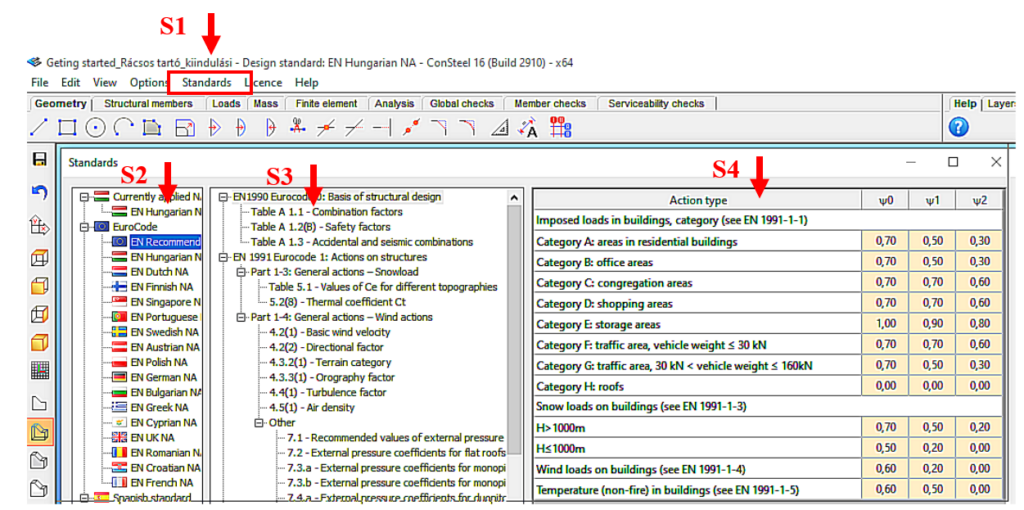
(S1: access standards; S2: select applicable standard; S3: select standard content; S4: display standard parameters).
The desired design standard can be selected from the list on the left of the panel. In this case, we select the EN Recommended option [S2]. The parameters applied by the selected standard can be accessed by selecting the corresponding row of the middle table [S3] of contents in the right-hand table [S4]. In Figure 2, the combination factors corresponding to Table 1.1 of the EC0 standard have been selected, whose parameters are shown in the right-hand table.
Setting the grid raster editor
First, let’s set the size of the raster according to the span of the structure by using the corresponding button [1] of the tool group on the left, which will bring up the Grid and Coordinate System adjustment panel (Figure 3).
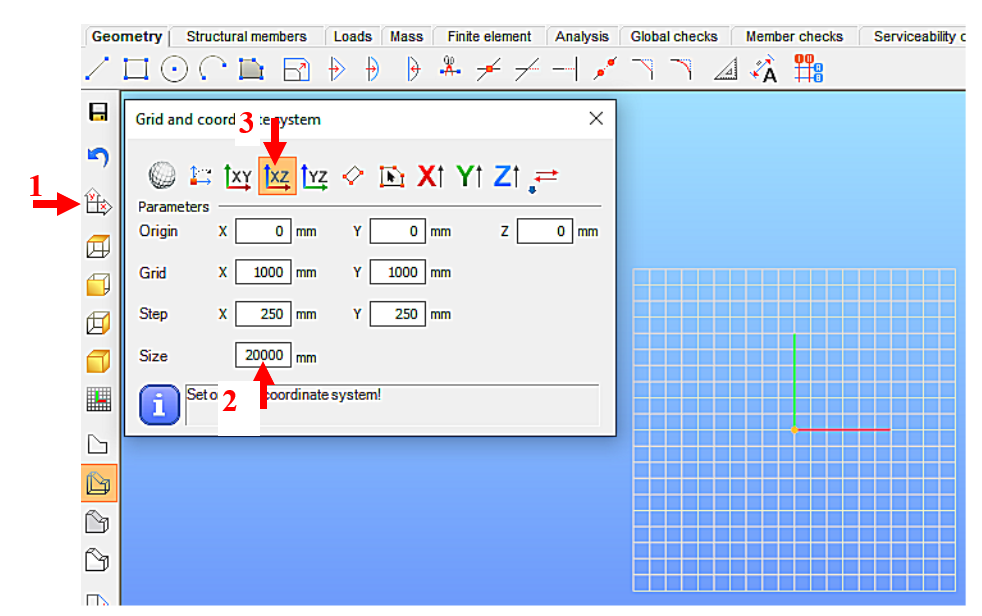
(1: set raster grid and coordinate system; 2: set raster occupancy size; 3: select view)
For example, for the 19.6m long support, the Size window can be set to 20000 millimeters [2]. To update the setting, press Enter. With the above setting, the raster will be 20m wide in X and Y directions, the raster line density will be 1000mm, and the step spacing will be 250mm. It is convenient to add the grid support model in the X-Z global coordinate plane, so the raster editor will be rotated to the X-Z plane. To do this, select the XZ plane option [3].
Loading initial cross-sections
One fundamental characteristic of general structural analysis programs is that they can only work with specifically defined cross-sections. Therefore, the first step is to choose the initial cross-sections for the task, according to the conceptual design. This may seem contradictory to the simple manual methods taught in basic statics courses, where the specific dimensions of the cross-section were often irrelevant information (e.g. calculation of internal forces). When using computer programs, however, we need to provide specific cross-sections even if their dimensions do not affect the static quantities to be calculated (e.g. in the present case, the normal forces of a truss beam). Nevertheless, we should aim to select cross-sections that match the geometrical size of the structure. In this case, the preliminary design served this purpose.
Initially, the section library for the current model is empty, so we first need to select the appropriate cross-sections. To do this, go to the Structure Members tab [4] and select the Section Administration option [5] on the left side of the horizontally positioned tool group, then select the "From Library..." button [6] in the panel that appears (Figure 4).
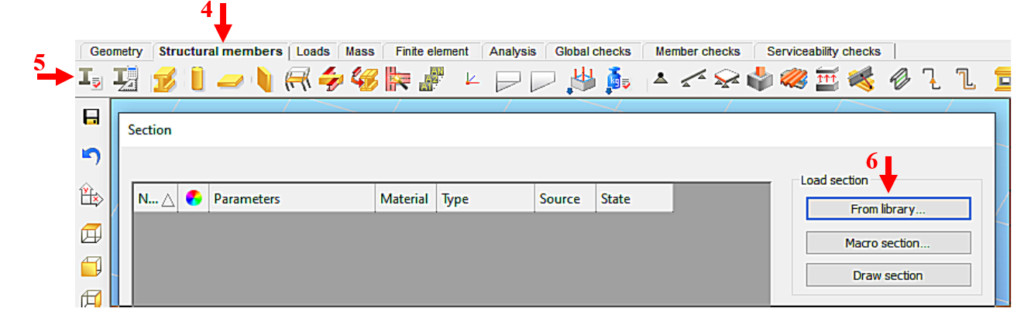
(4: picking up structural elements; 5: calling up the section control panel;
6: Select section type)
Figure 5 shows the loading of the HEA120 section, compliant with the European standard, which will be assigned to the chords. We select the region of the cross-section standard (European) and then its type (H profiles). From the list that appears, we can select the type of section (HEA) [7] and then the height of the section (120) [8]. By pressing the Load button [9], the program learns the cross-section, and from then on it knows everything about the cross-section and can work with it. Repeat the procedure as many times as you need different sections. Finally, the window is closed by pressing the Close button [10].
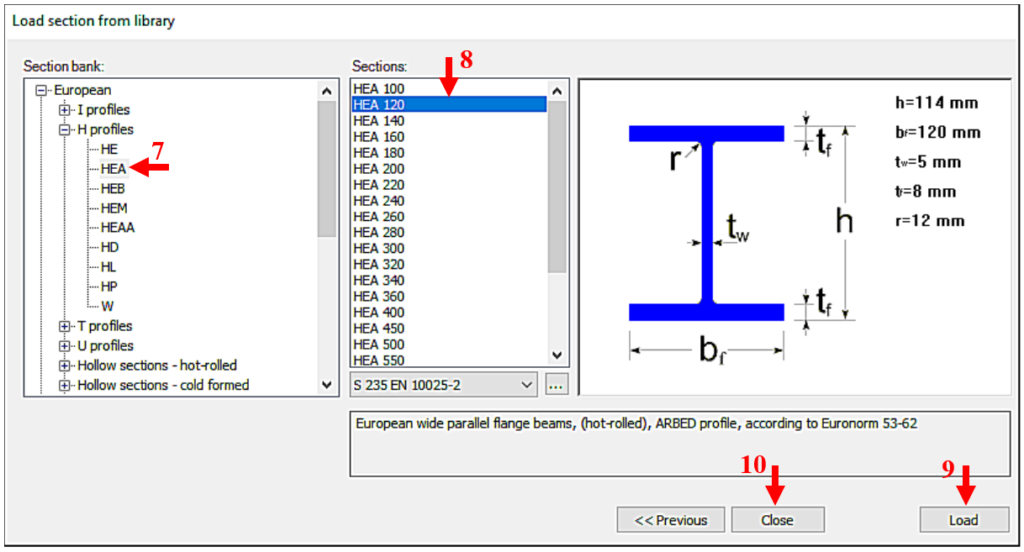
(7: select section type; 8: select section size; 9: scan selected section; 10: end loading process)
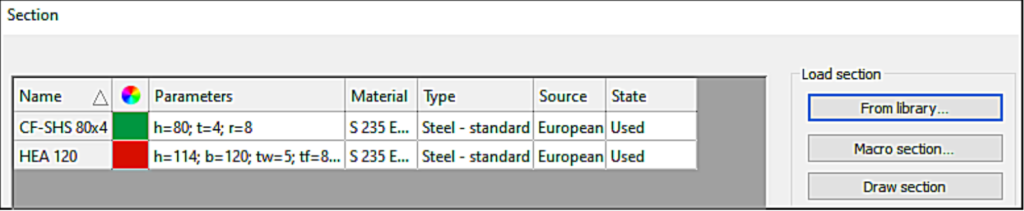
In our case, also a CF-SHS 80x4 closed section (from Library/Hollow sections - cold formed/CF-SHS/CF-SHS 80x4) was loaded for the bracing members (Figure 6).
Later on, you can obtain all the information about the cross-section using the Section module. To do this, select the cross-section in the table by clicking on the corresponding row and then click on Properties... to display all the properties of the cross-section, such as type data; cross-section characteristics, etc. The program works with two cross-section mechanical models in a dual manner. The GSS (General Solid Section) model [11] is used for static calculations and the EPS (Elastic Plate Segment) model [12] for standard design operations (Figure 7). The cross-sectional properties (surface area, moments of inertia, etc.) can be displayed by pressing the button [13].
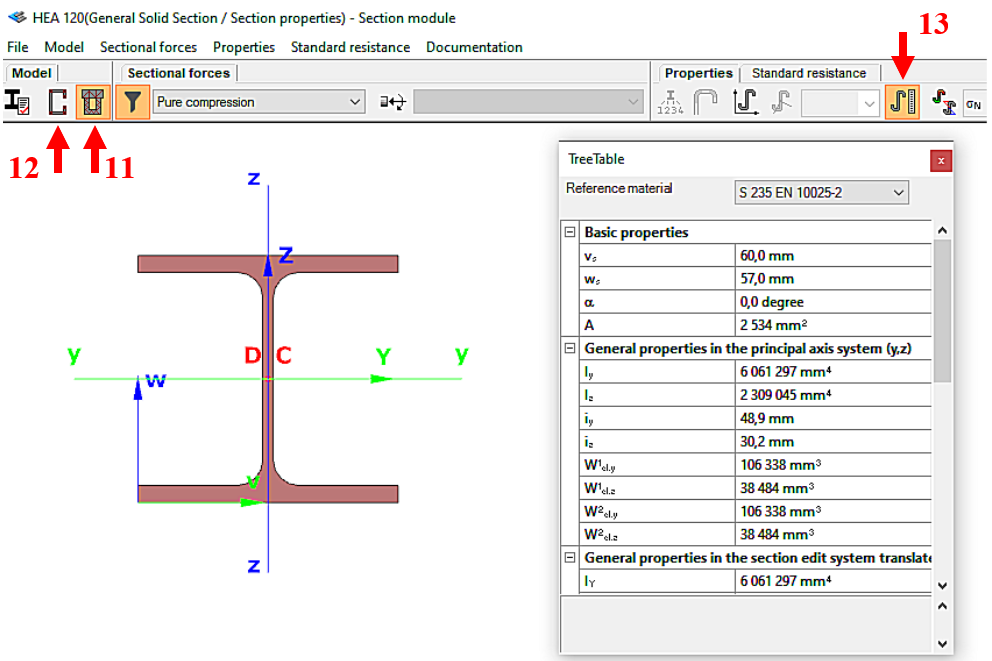
(11: Open GSS general section model; 12: Open EPS elastic plate segment model;
13: open cross-sectional properties table)

Log in to view this content
Online service access and support options are based on subscription plans. Log in to view this content or contact our sales department to upgrade your subscription. If you haven’t tried Consteel yet, try for free and get Pro access to our learning materials for 30 days!