
Introduction
In ConSteel, there are three options for designing reinforced concrete columns: the Manual Nominal Curvature Method, the Automatic Nominal Curvature Method, and the Nominal Stiffness Method.
Each method has its advantages and disadvantages and should be used in different situations. We will now briefly review these methods and show how they can be used. Example models and a flowchart guide is also available at the end of the overview.
You can find the related chapters within the Online Manual about how to access these features in the Structural design and Structural modeling chapters.
Summary table
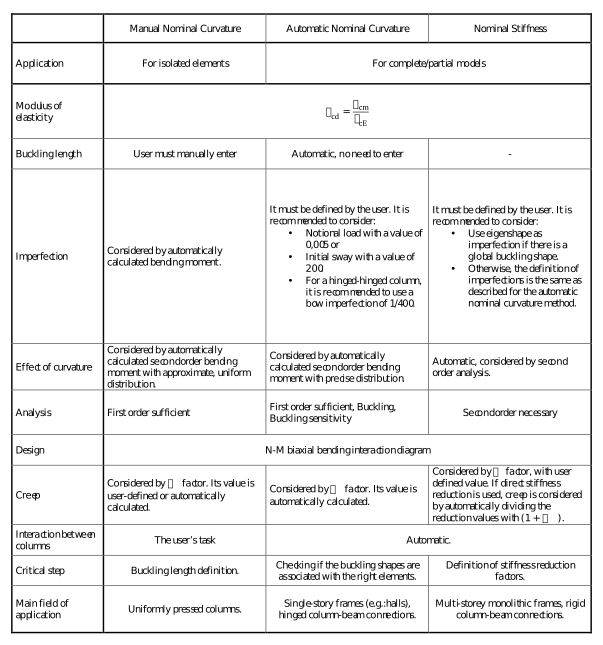
The following table summarizes the most important information about the three methods. Click on the table to see it in full screen.
We will now illustrate the application of these methods with a few short examples.
Examples
Manual Nominal Curvature Method
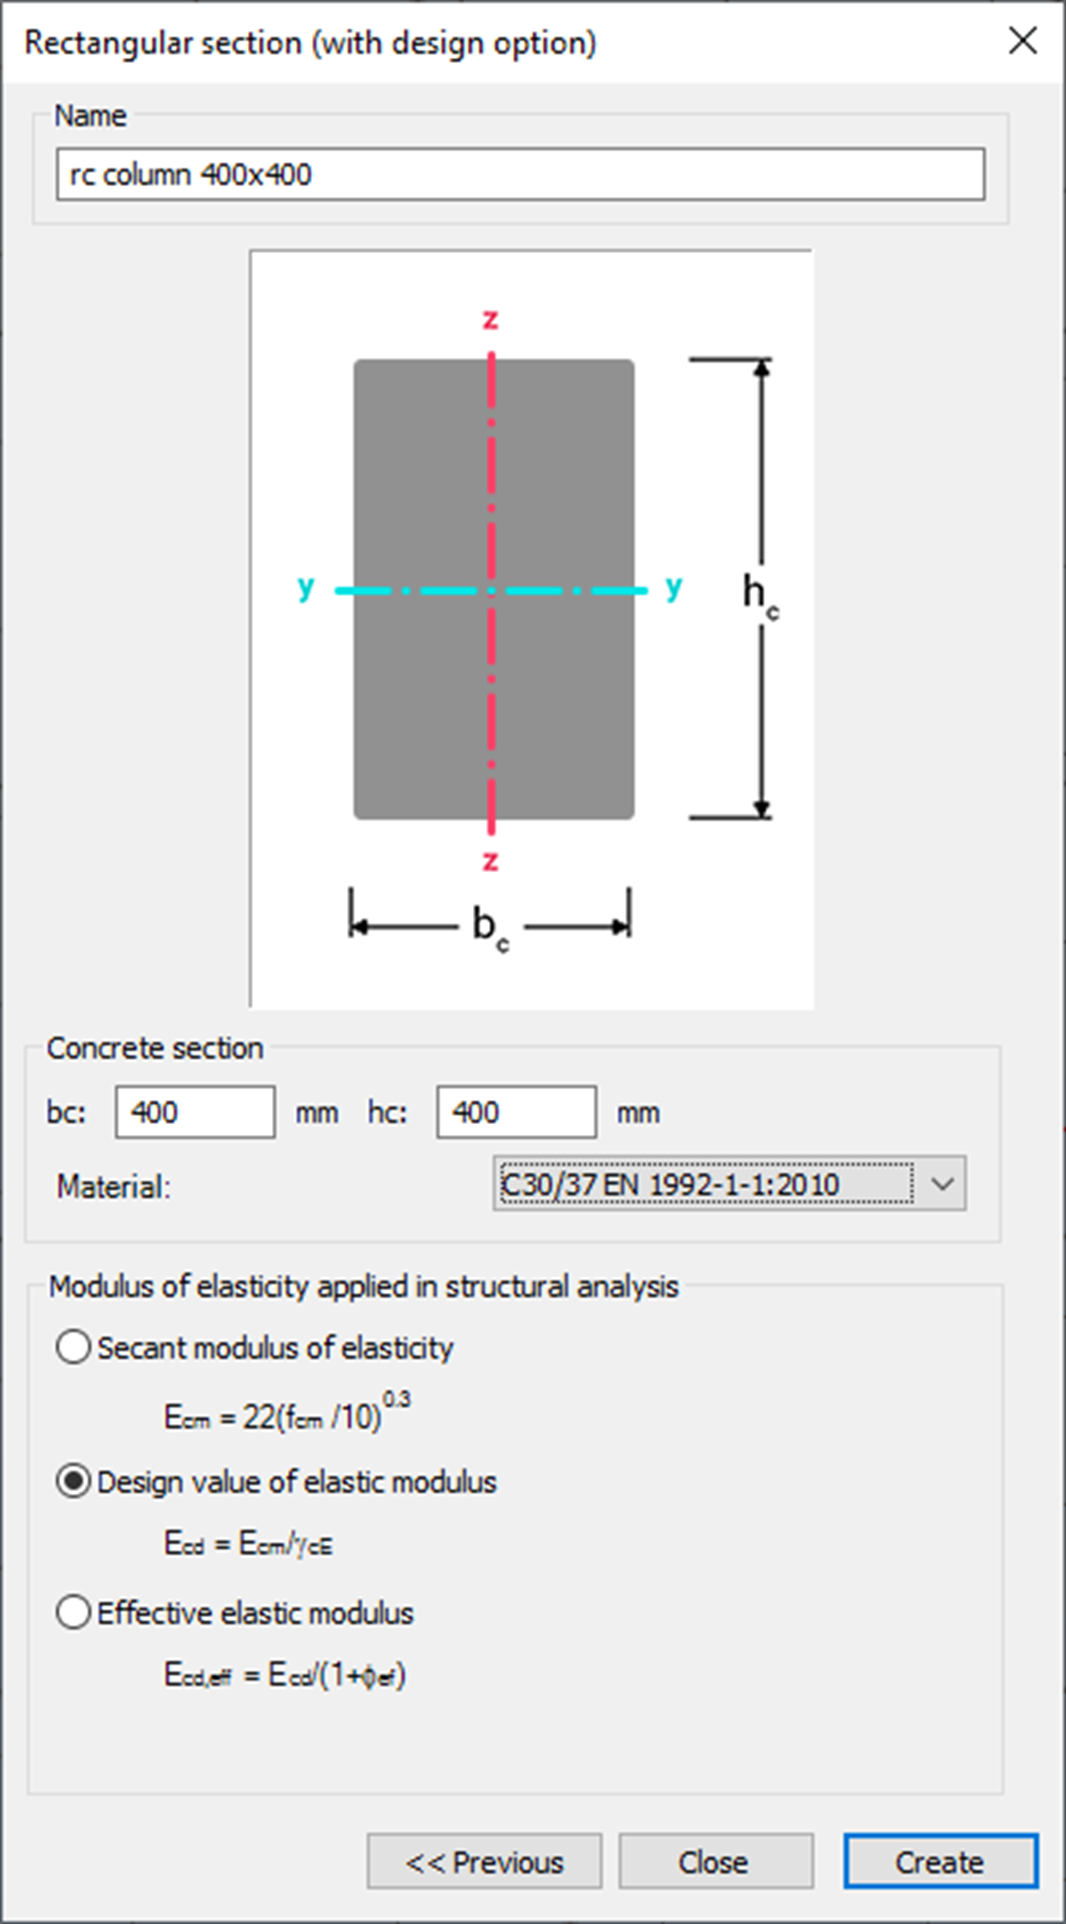
Create section
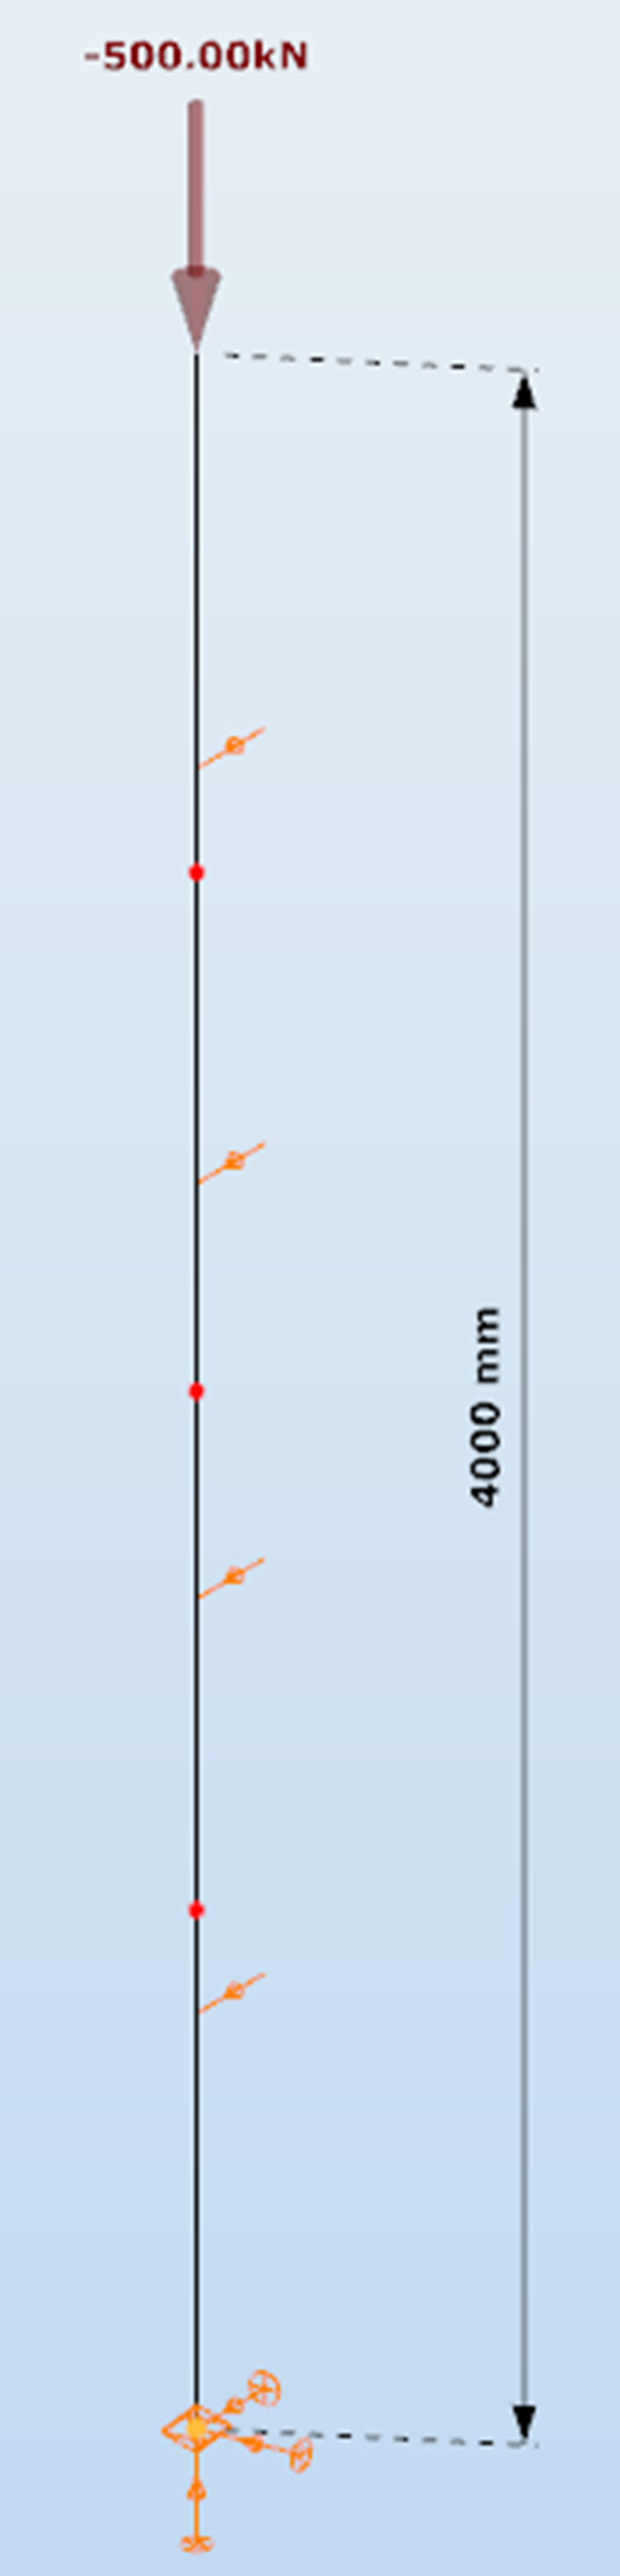
Define structure without imperfections
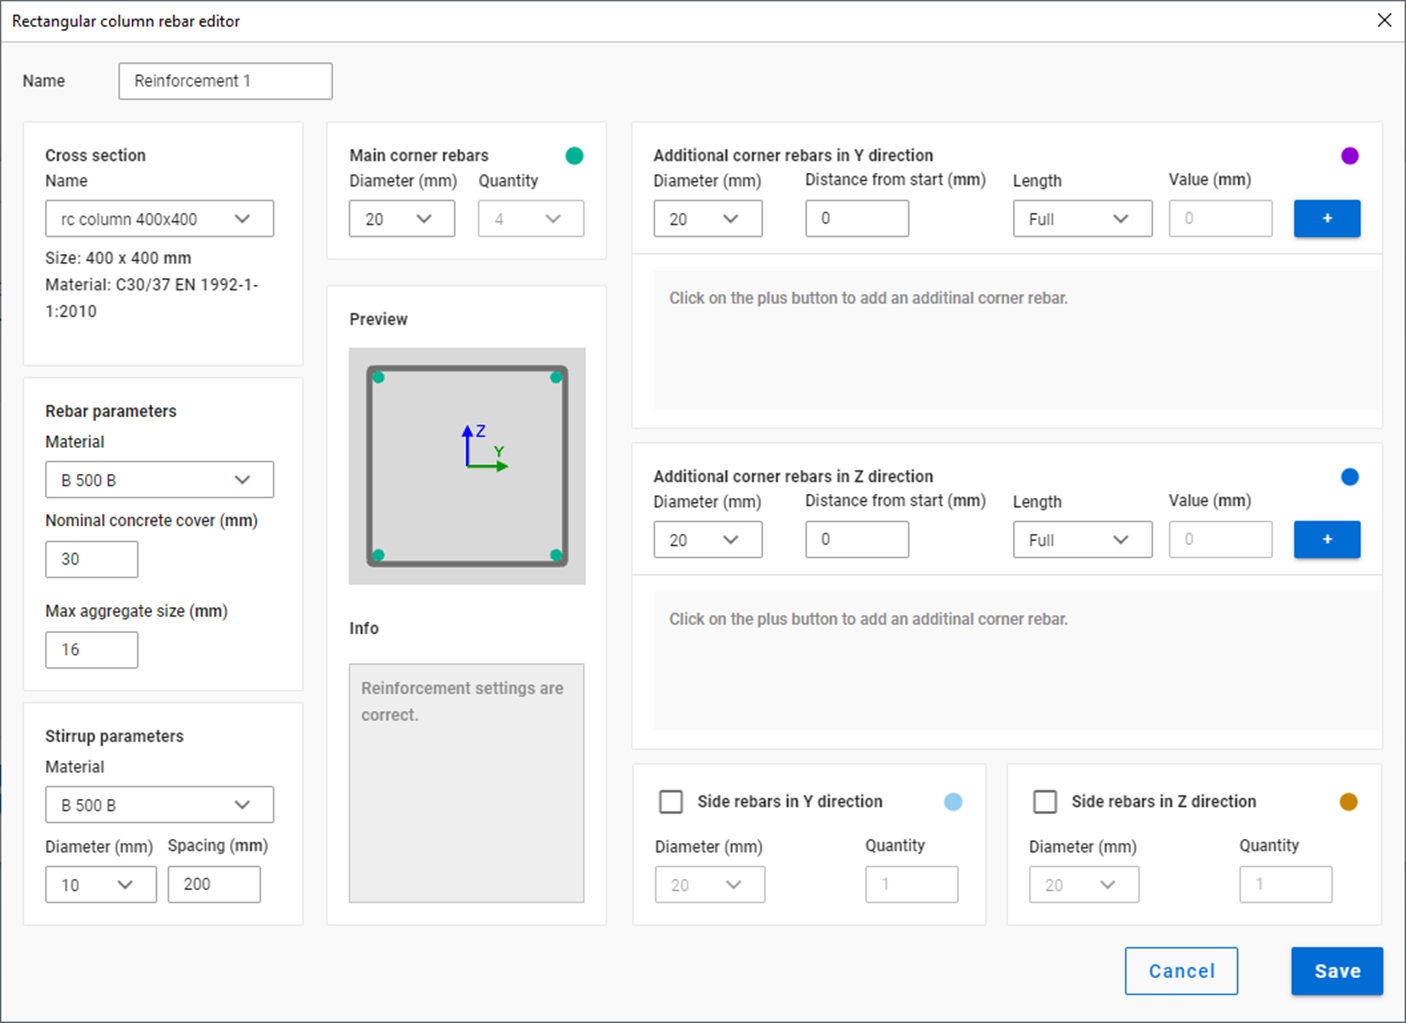
Define reinforcement
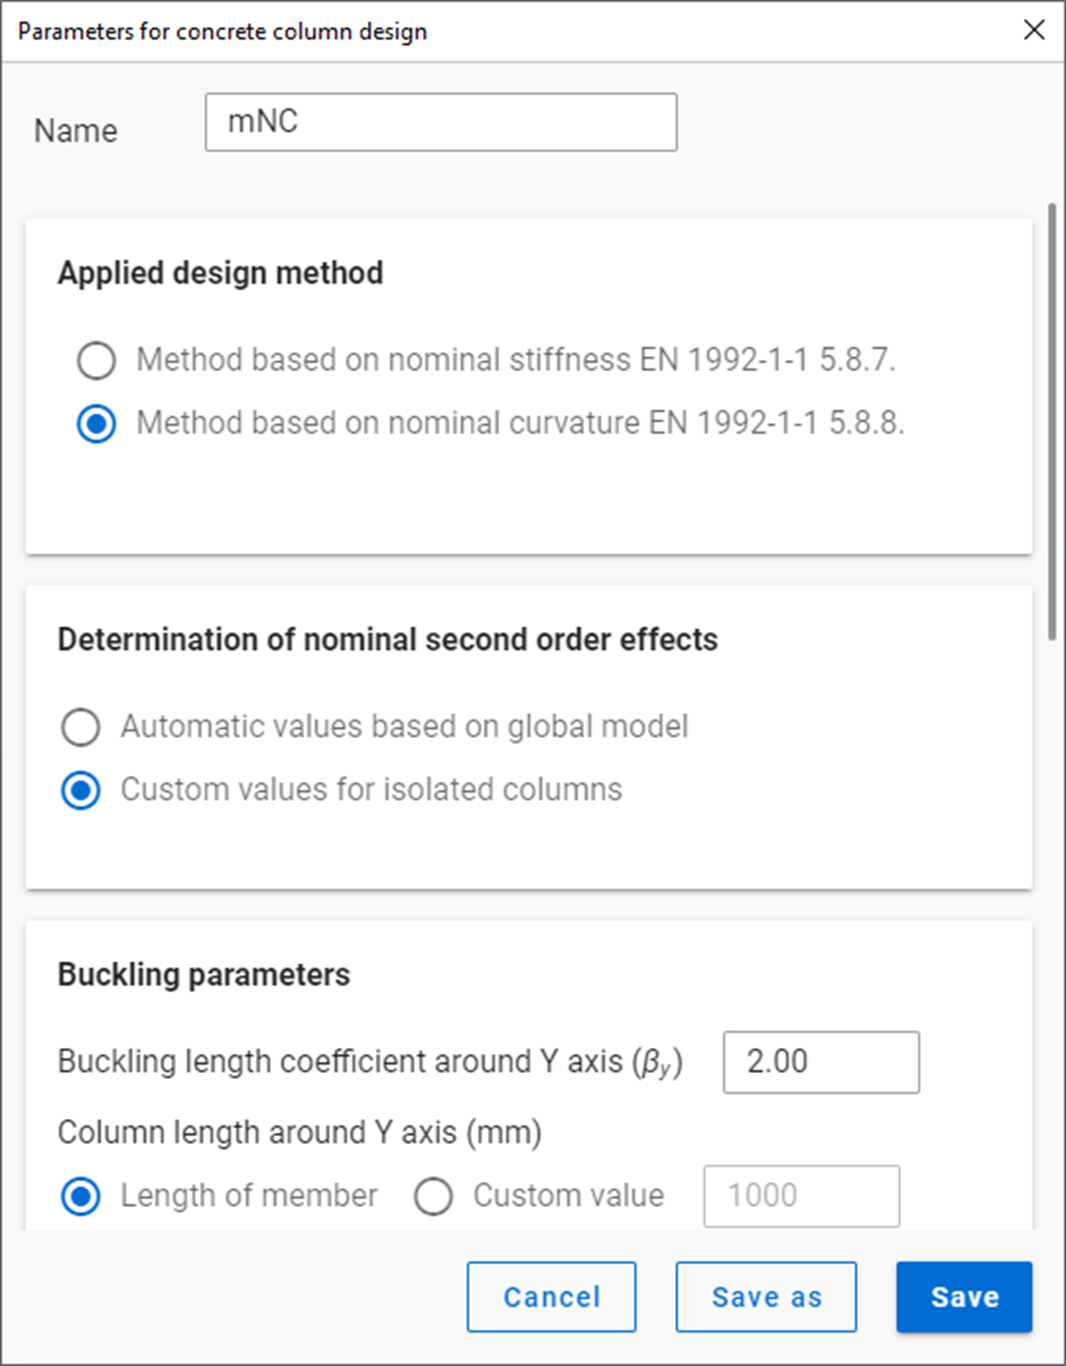
Define design parameters
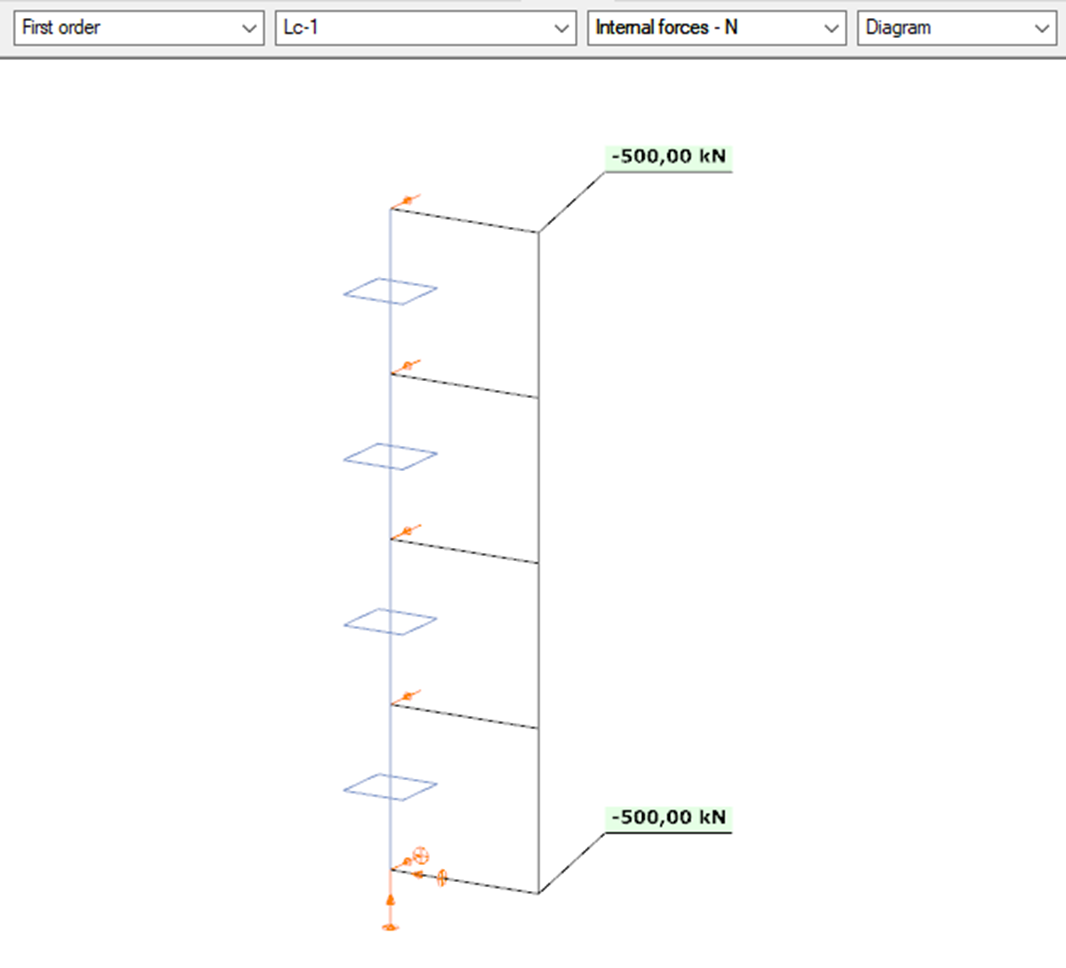
First order analysis
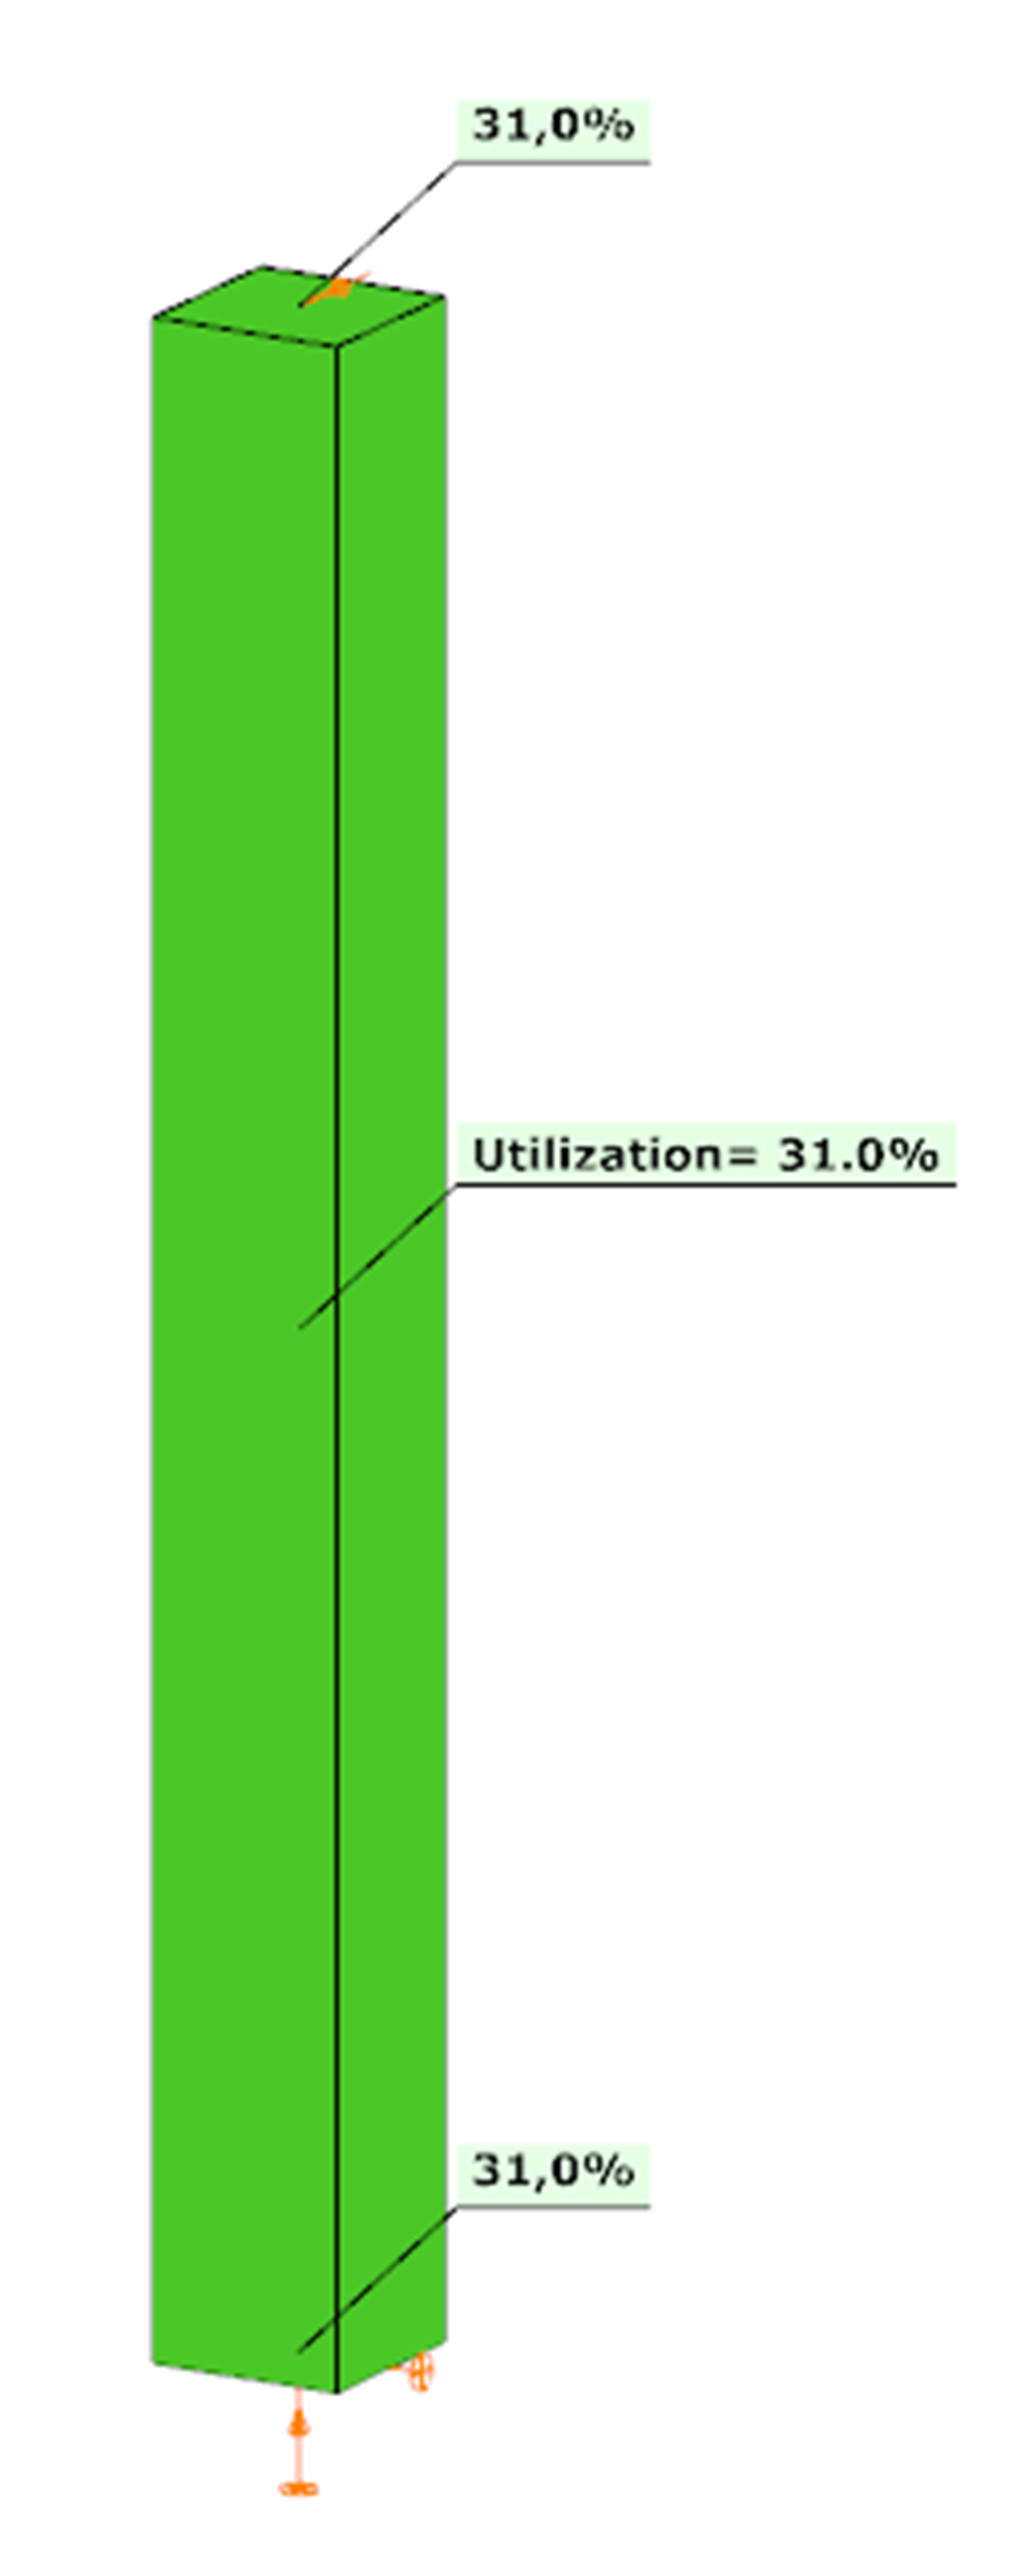
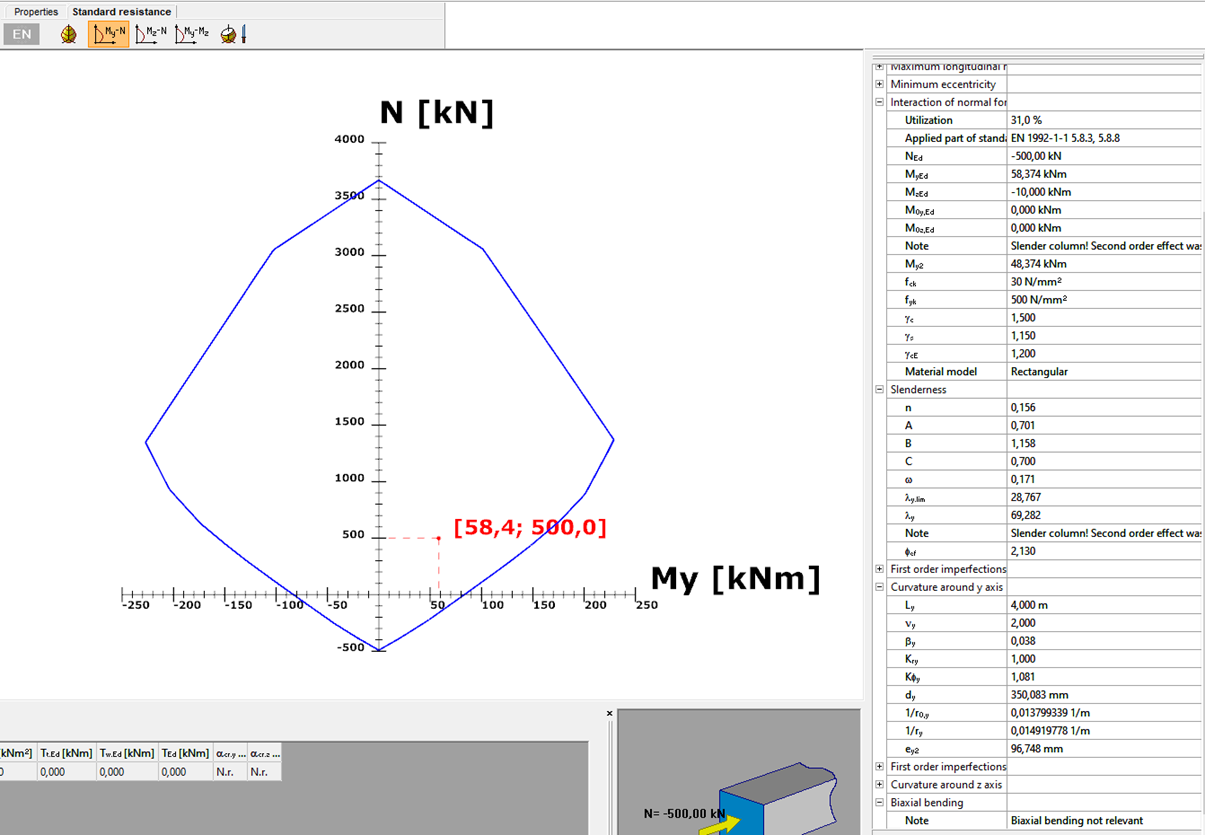
Design
Automatic Nominal Curvature Method
Only the steps presented, which are different from the Manual Nominal Curvature Method.
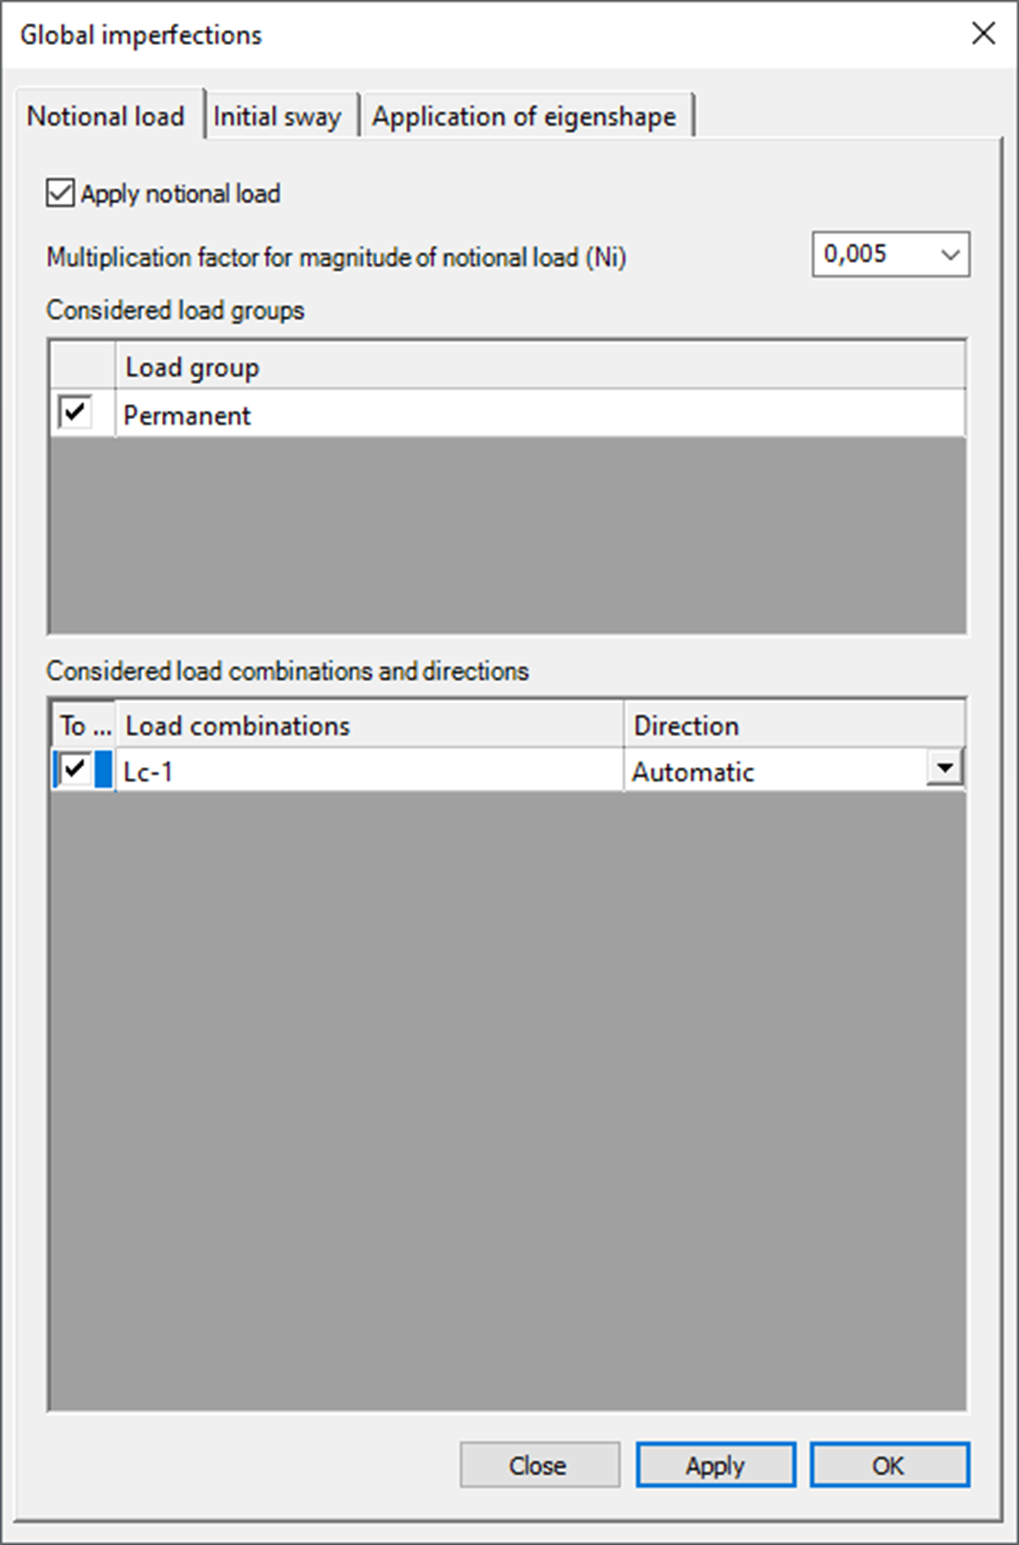
Imperfections
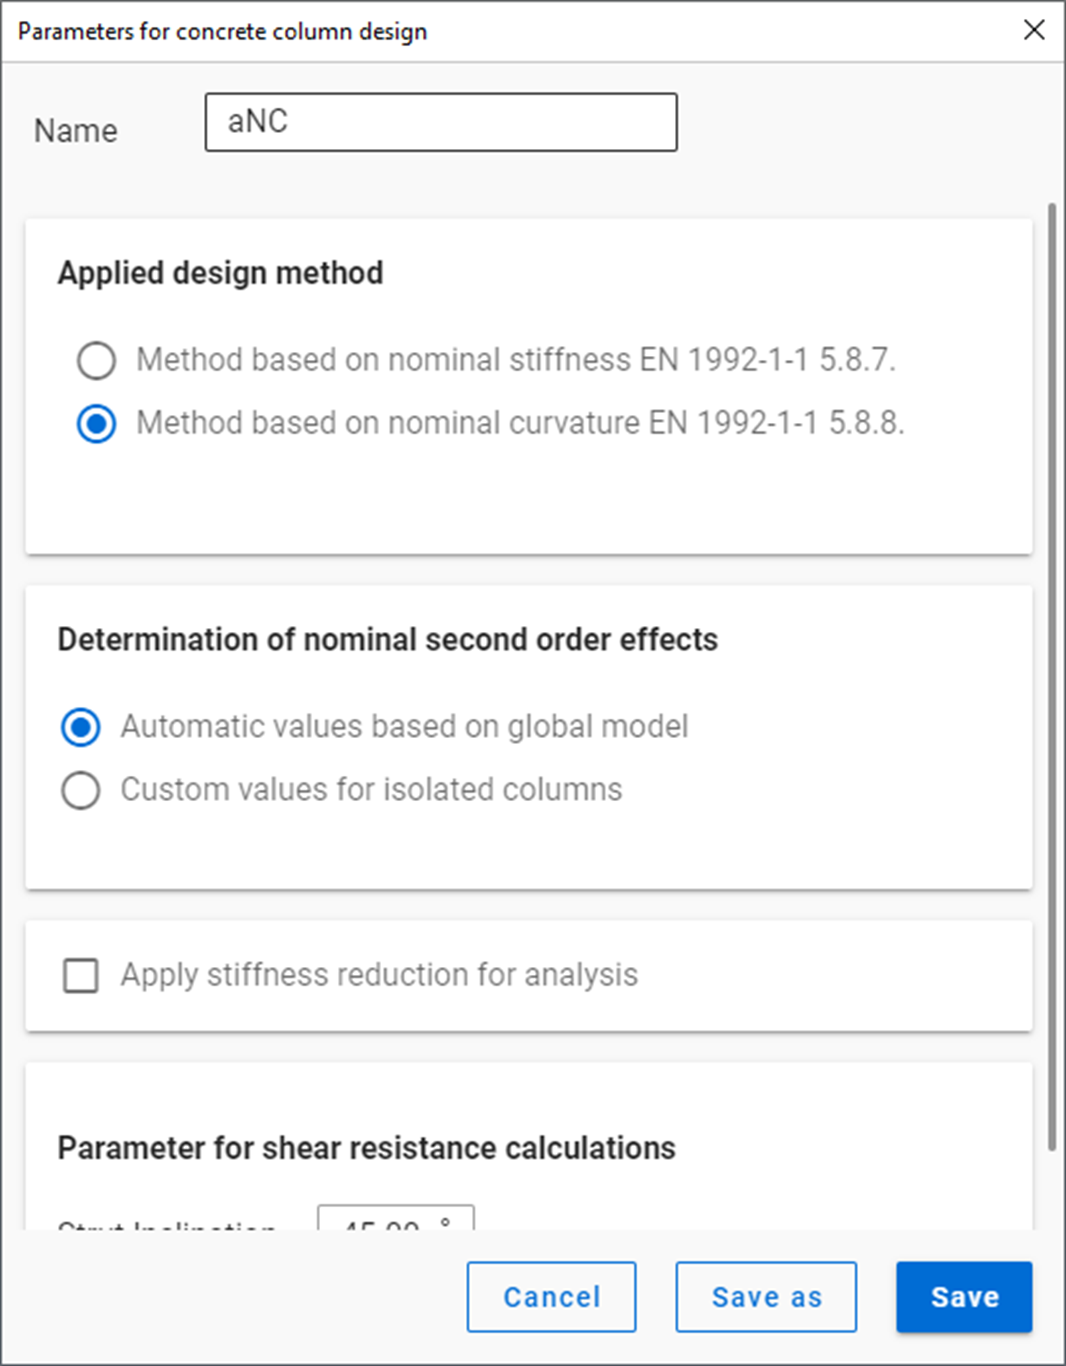
Design parameters
First order analysis – with imperfections
gateDid you know that you could use Consteel to design a hot-rolled crane beam considering the effect of code-prescribed load eccentricities?
Designing crane beams often involves more than simply applying vertical loads. Code-prescribed eccentricities, arising from rail positioning, wheel load distribution, and horizontal forces, can significantly influence internal forces and stability checks.
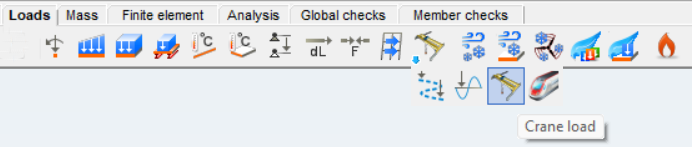
In Consteel, you can define three types of overhead traveling crane loads. The Standard option is fully based on EN 1991-3, following the code provisions directly. With Standard load based, you specify the standard-defined wheel loads, and Consteel automatically creates the corresponding load groups for you. The User defined option gives you full control, letting you input the wheel loads individually for each wheel, which is useful if your crane has a non-standard configuration.
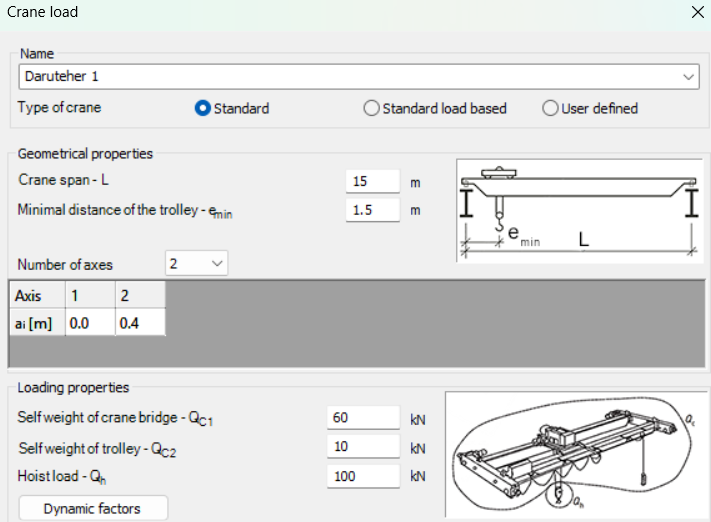
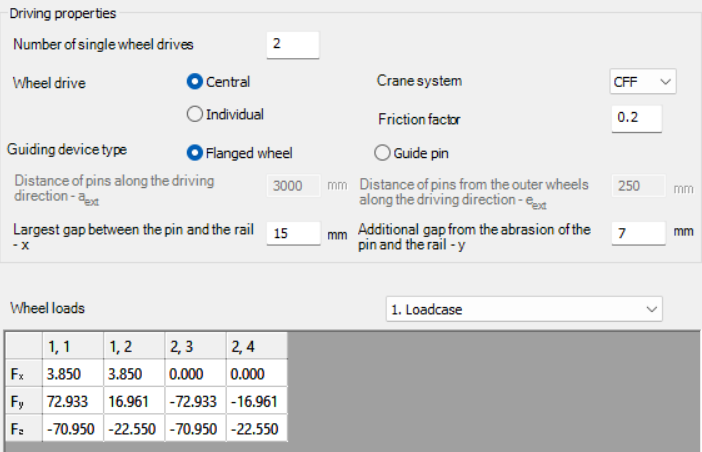
Once you select the type of crane load, you set the crane’s geometry, loading, and driving properties according to the chosen method. This includes parameters such as the crane span, trolley distances, number of axes, self-weight of the bridge and trolley, elevated load, number of driven wheels, drive system, friction factor, and guiding device.
For Standard and Standard load based options, Consteel calculates the wheel loads automatically and generates the load groups, while the User defined option lets you input each wheel load manually. The calculated wheel loads can be reviewed for each load case, helping you ensure that the crane beam design reflects the actual forces according to the selected standard or custom configuration.
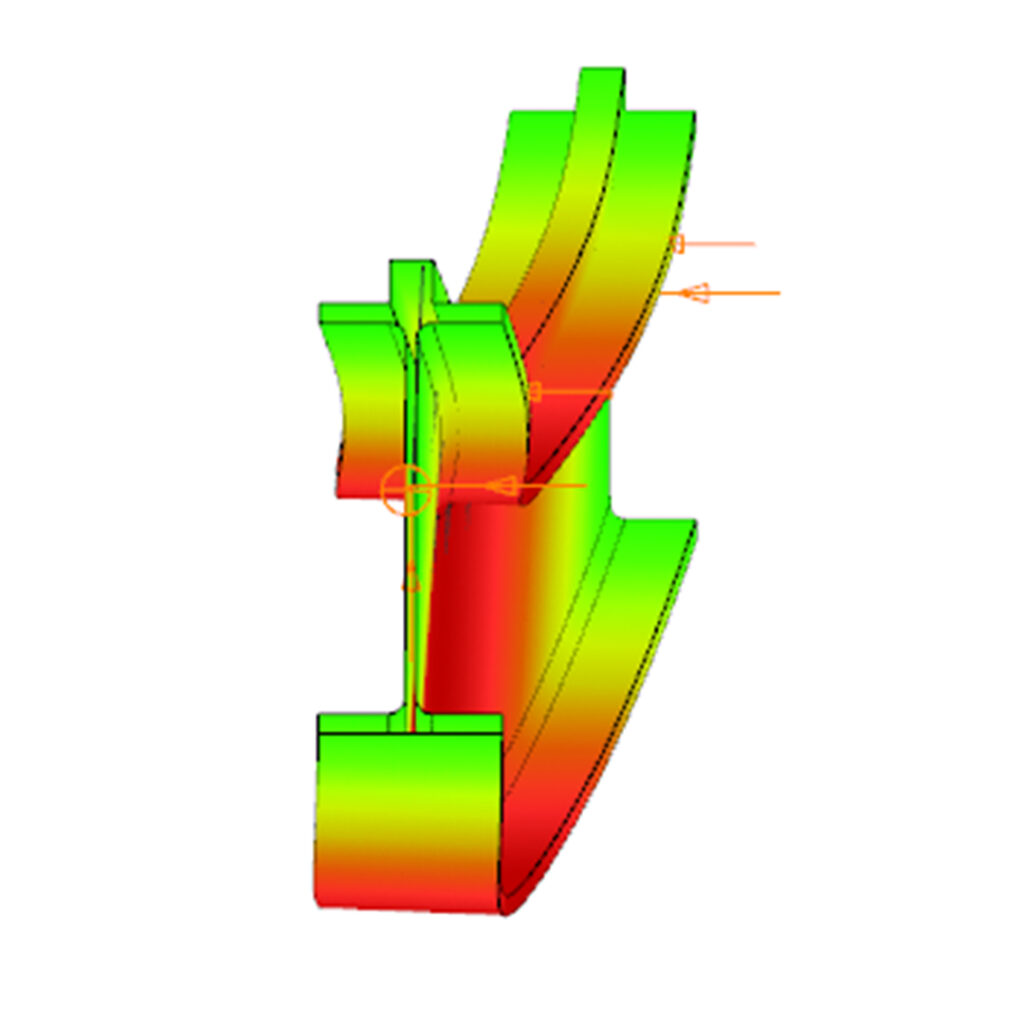
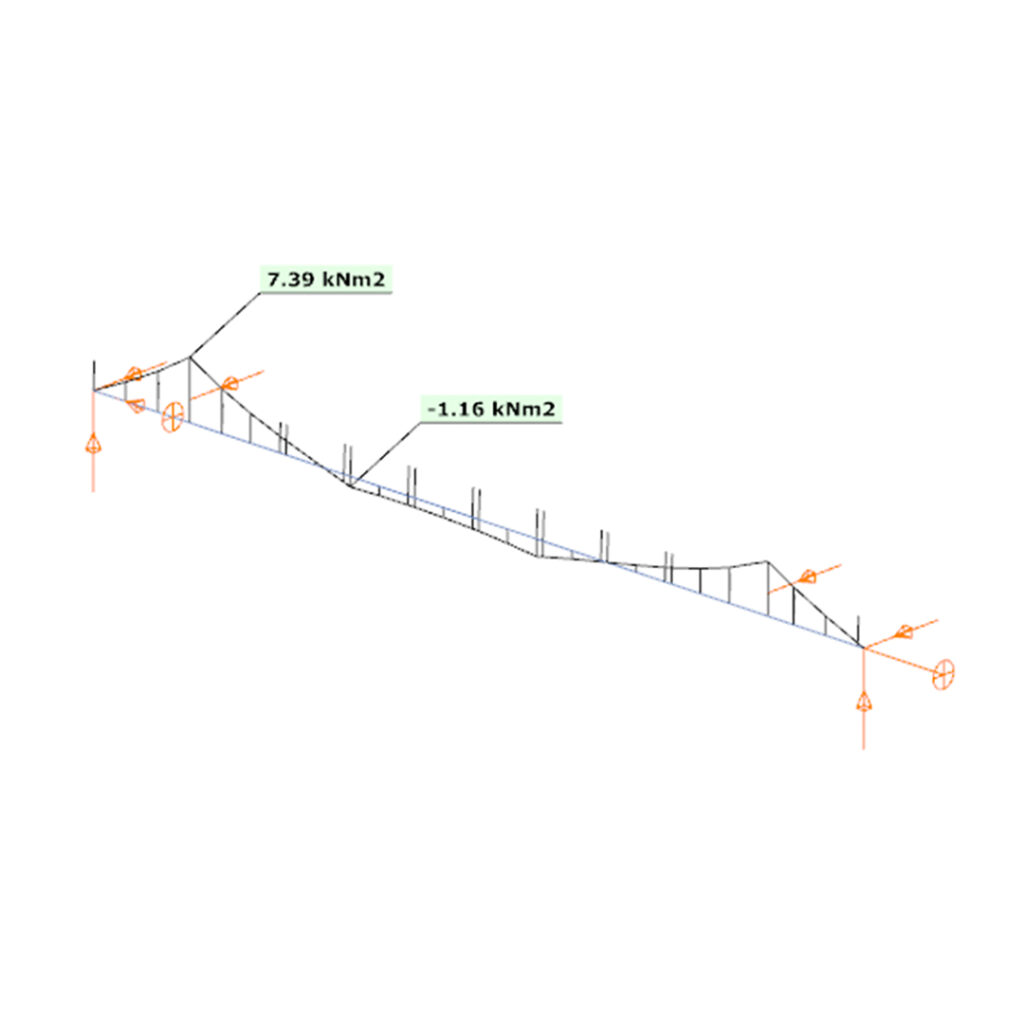
A key aspect of this method is that the eccentricity of the wheel loads is included directly in the analysis. This means that the internal forces along the beam account for the positioning and distribution of the loads.
By carefully defining the crane geometry, load magnitudes, and driving properties, the resulting bending moments and shear forces correspond closely to the real crane configuration, allowing for a reliable assessment of the hot-rolled crane beam under the prescribed loads.
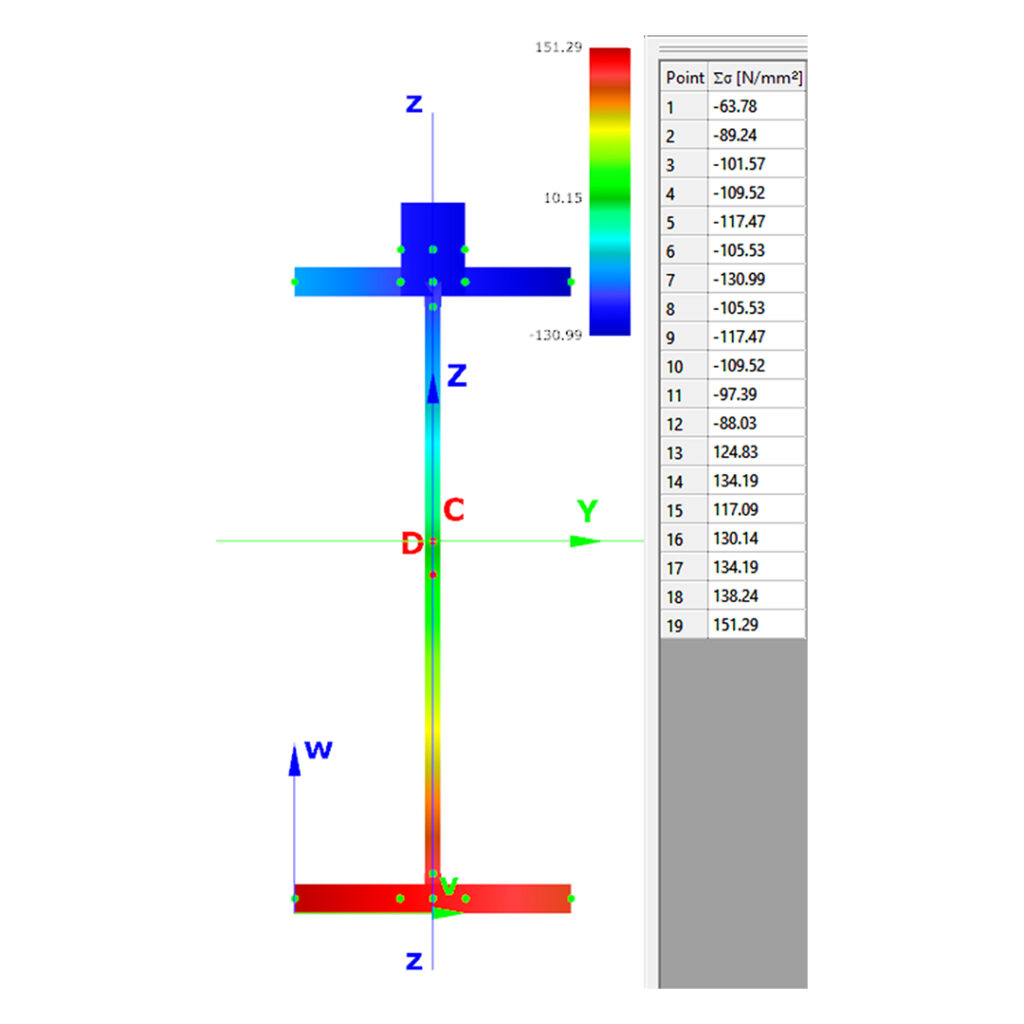
Download the example model and try it!
Download modelIf you haven’t tried Consteel yet, request a trial for free!
Try Consteel for freeIn Consteel 16, we introduced the function of load combination filter. Filtering is possible based on the load combinations’ limit state, load cases, and corresponding analysis and design results. The goal is to create different sets for the different steps of the optimization and reduce calculation time while making sure that all the relevant load combinations are considered. Let’s see what a conscious design workflow looks like in practice!
Description
It is a significant problem in almost all structural design projects that the standards define many possible load cases and combinations to evaluate. Although most of these load combinations are never relevant or provide decisive design situations, it is usually not evident which ones might be neglected safely, especially when considering, that different load combinations can be relevant for different parts of the structure, like primary or secondary structure, connections, etc. Accordingly, the optimization process is overloaded by a large amount of unnecessary calculations.
With the load combination filter function, a reduced list of load combinations aka a load combination set can be created and saved for the different steps of the optimization.
The optimal workflow for the filter may vary for the different purposes the sets are created for, but there is a recommended general process that can serve as the basis for all of them. First, run the simplest calculations and use the results for a rough selection which will already decrease the number of load combinations noticeably. Then one can increase the complexity of the calculations and further reduce the list of combinations by using stricter filters. If needed, this step can be repeated. This iterative process allows us to avoid complex and time-consuming calculations for all the thousands of load combinations.
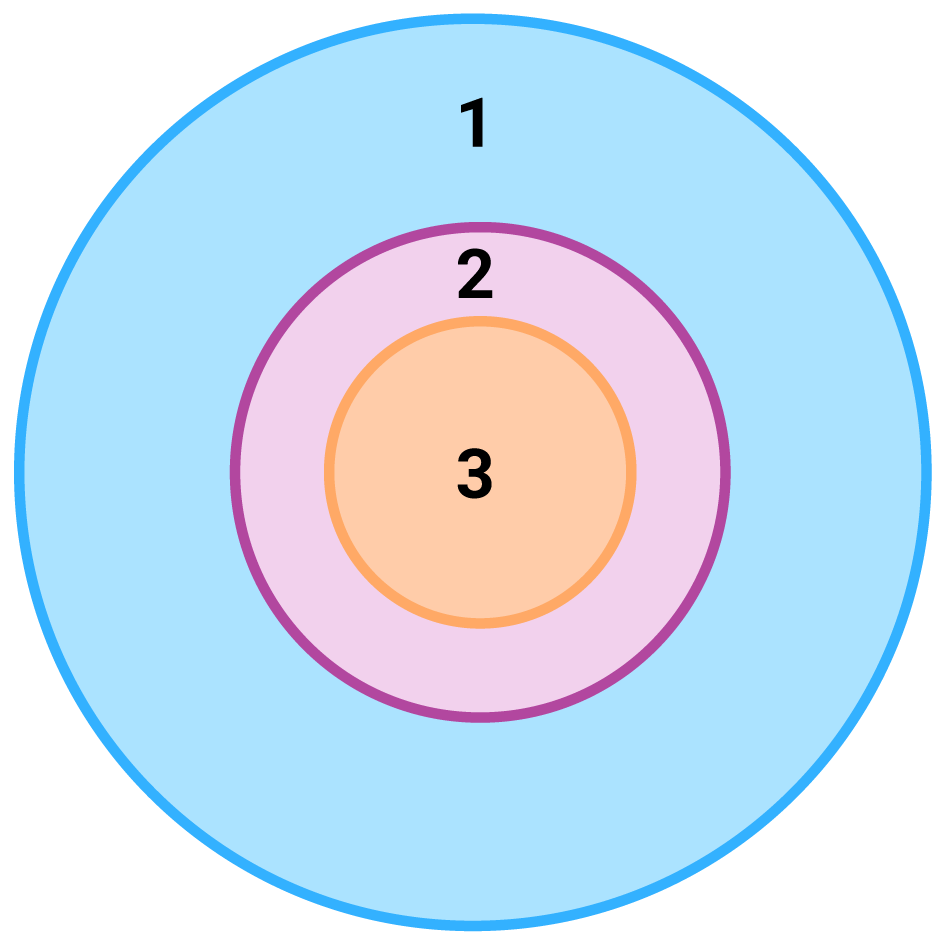
1 – all load combination, no filter;
2 – initial set with broad filter;
3 – working set with strict filter
Detailed process
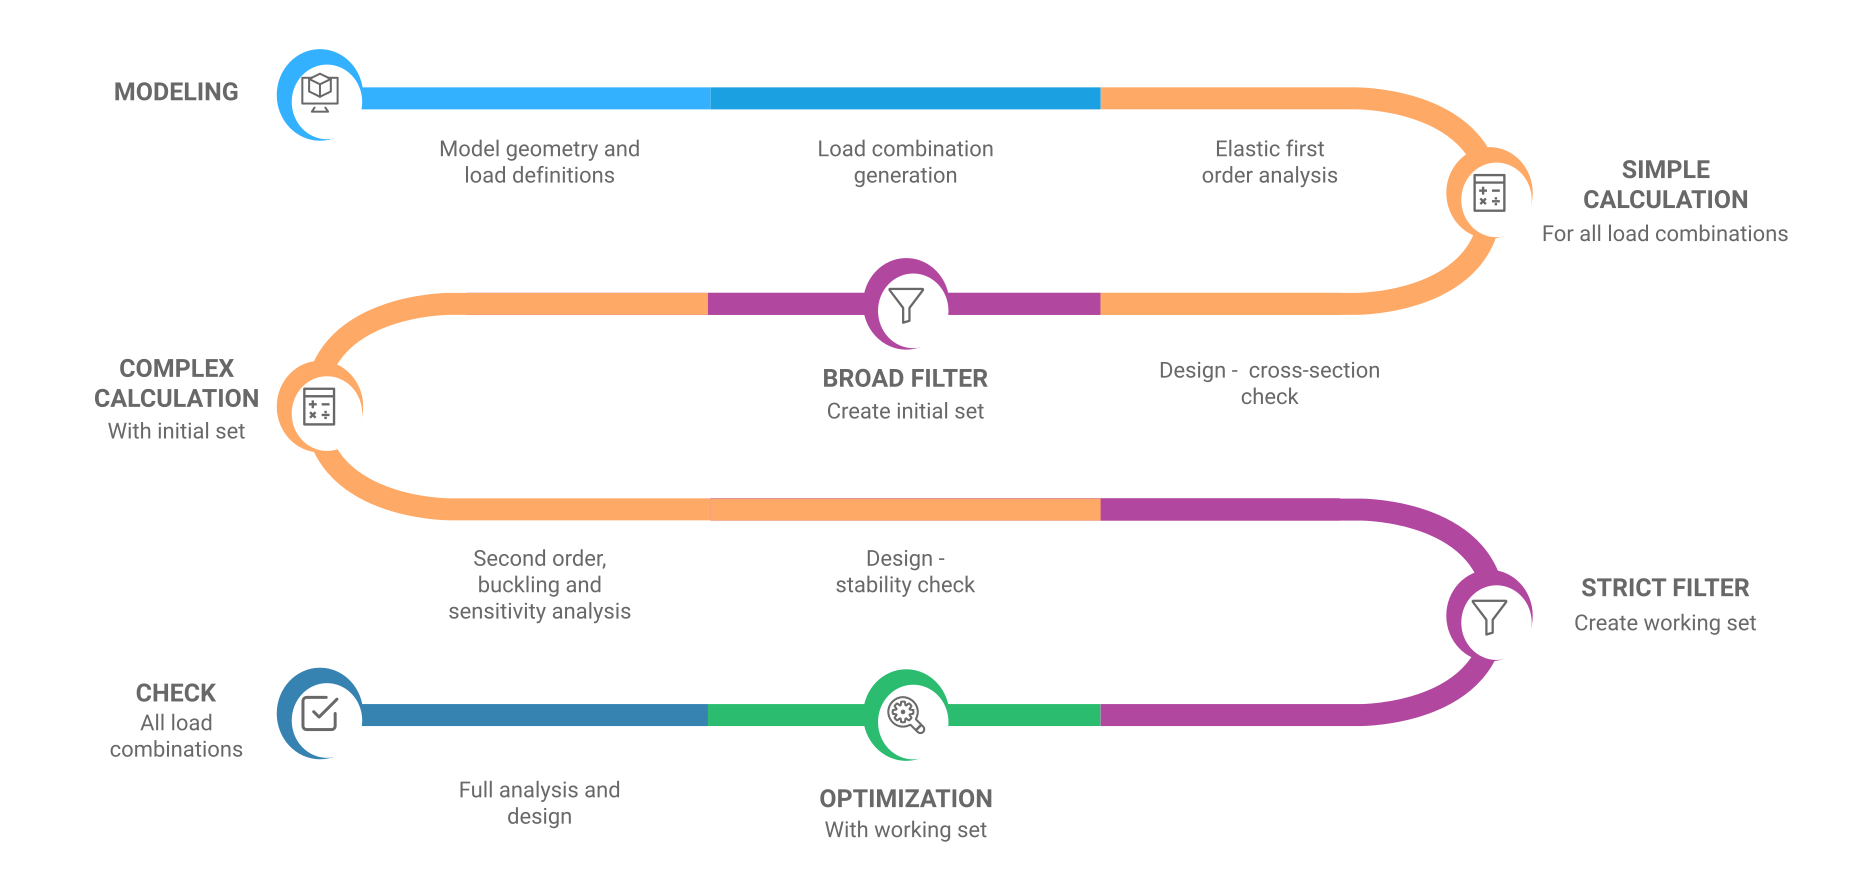
Modeling
The base of all optimization processes is a correctly built structural model. So, the first step is geometrical and structural modeling and load definition. It is advisable to run a first-order analysis for only one or two load cases and diagnostics to find possible modeling errors. Load combinations can be created after that. Every limit state that will be used during the whole design of the structure, should be defined. Consteel’s automatic load combination generation function is an efficient tool to do it.
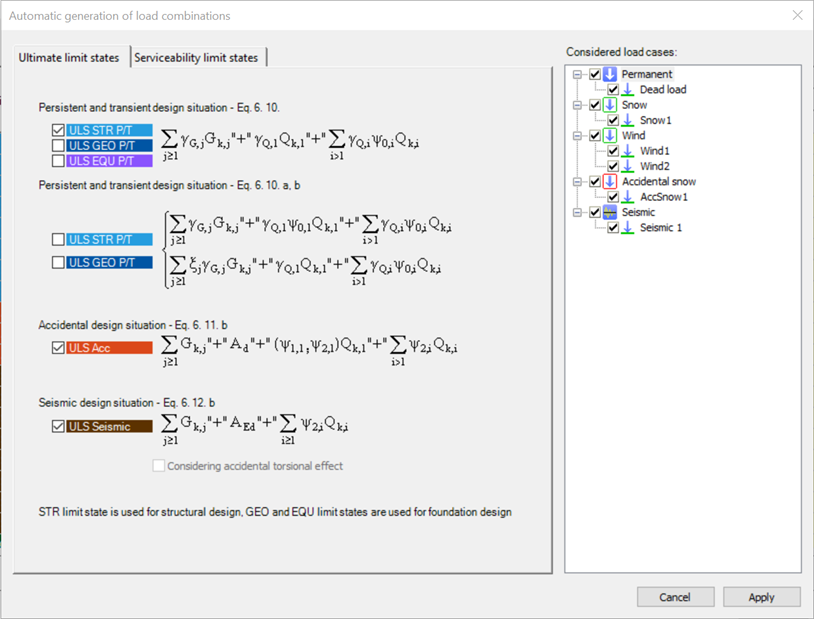
Calculation and filter
On the Load combination set definition dialog, it is possible to create load combination sets by selecting the combinations based on their limit state and/or the load cases they contain. But usually, filtering on specific analysis or design results will likely be more effective in reducing the number of combinations. Using the above-described general workflow, the steps are as follows:
gateIntroduction
It is essential for the effective work of the design engineers to have a model which is easy to overview. In Consteel there are several functions to achieve that such as layers and portions, and also Member coloring by cross-section.
How it works
The color of the displayed objects is now determined by the object style settings in Options.
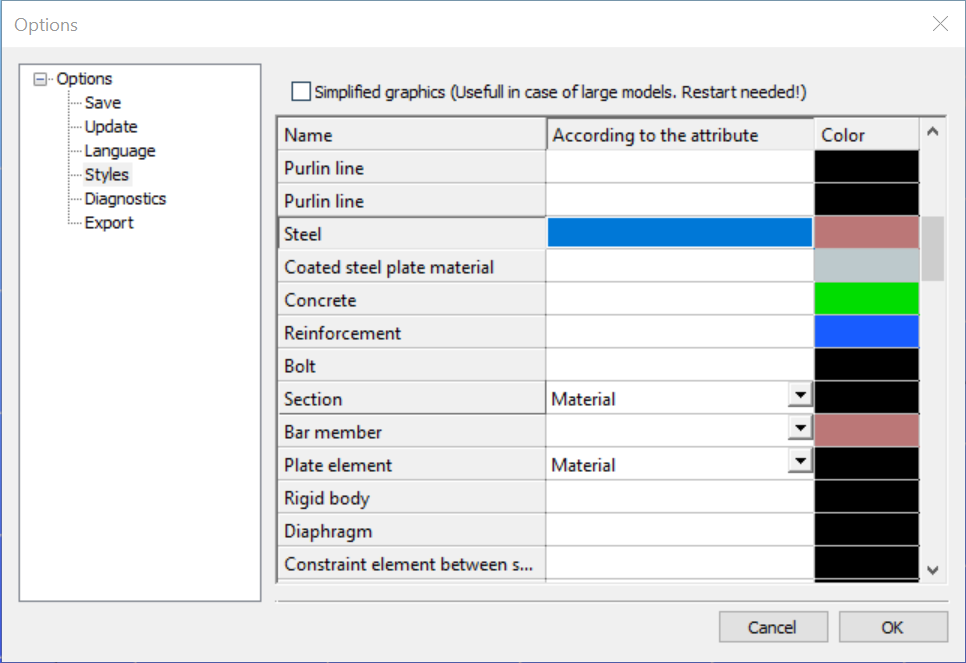
Layer color can overwrite these settings if the Layer style cell is checked on Layers dialog.
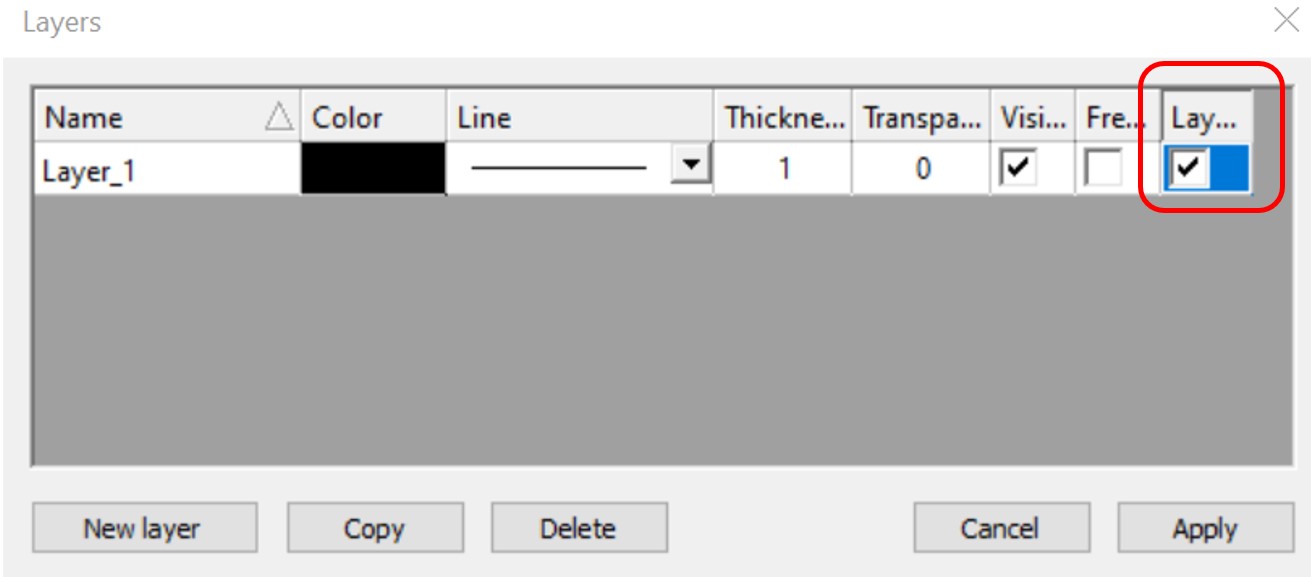
In the case of beam type members, it is also possible to set the color of the object according to the section it has defined. Coloring by member can be set with Object color setting dialog in the right bottom corner:
gateIntroduction
As it is important to have a clear overview of the structural model, the visualization of the analysis results is also essential when it comes to effective design process. From Consteel 15 we use an advanced method for deformation representation which makes it smooth and realistic.
Description
Civil engineering software in general use the traditional beam-type deformation representation where the section is shown on the deformation of the reference line. There are some consequences of this representation mode that can be disturbing for the users. The best example is an eccentric support, where the deformed shape is visualized as if the supported point would’ve moved. The reference line indeed moved but the supported point not – the representation can not show that.
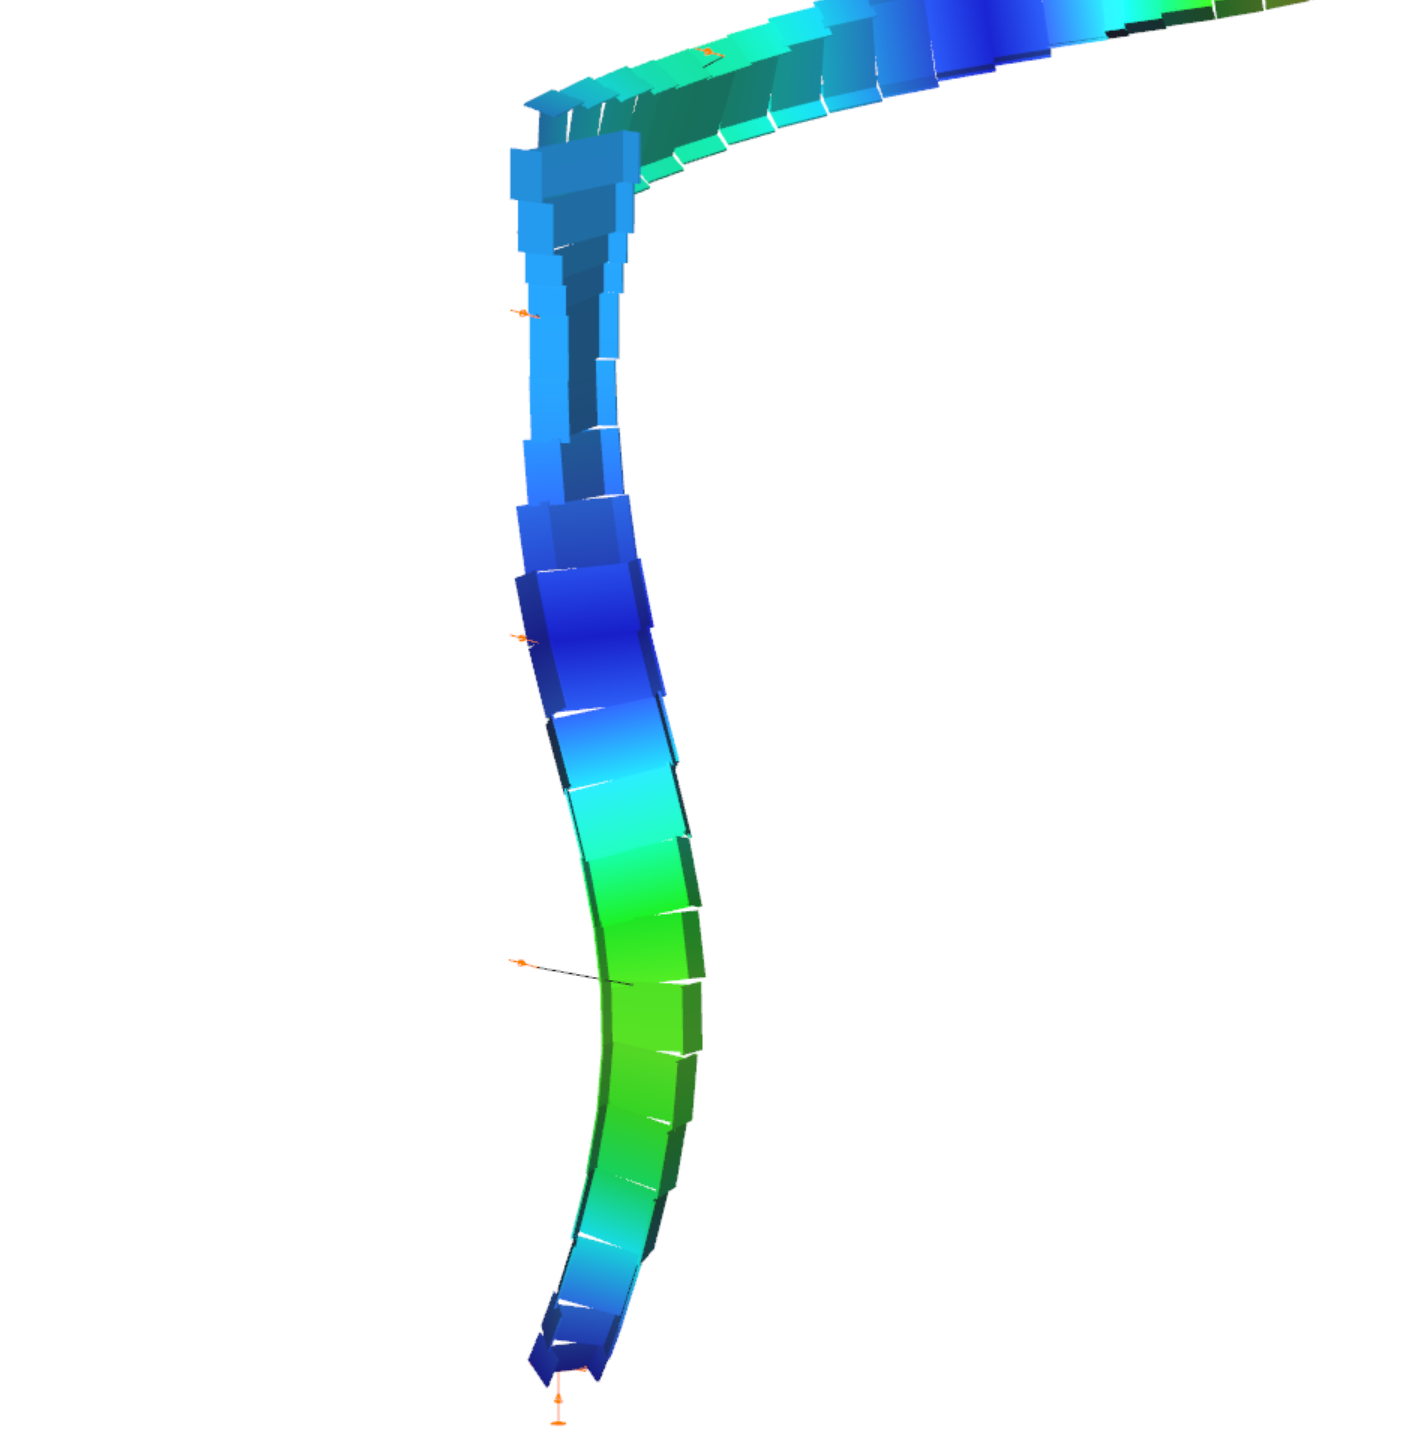
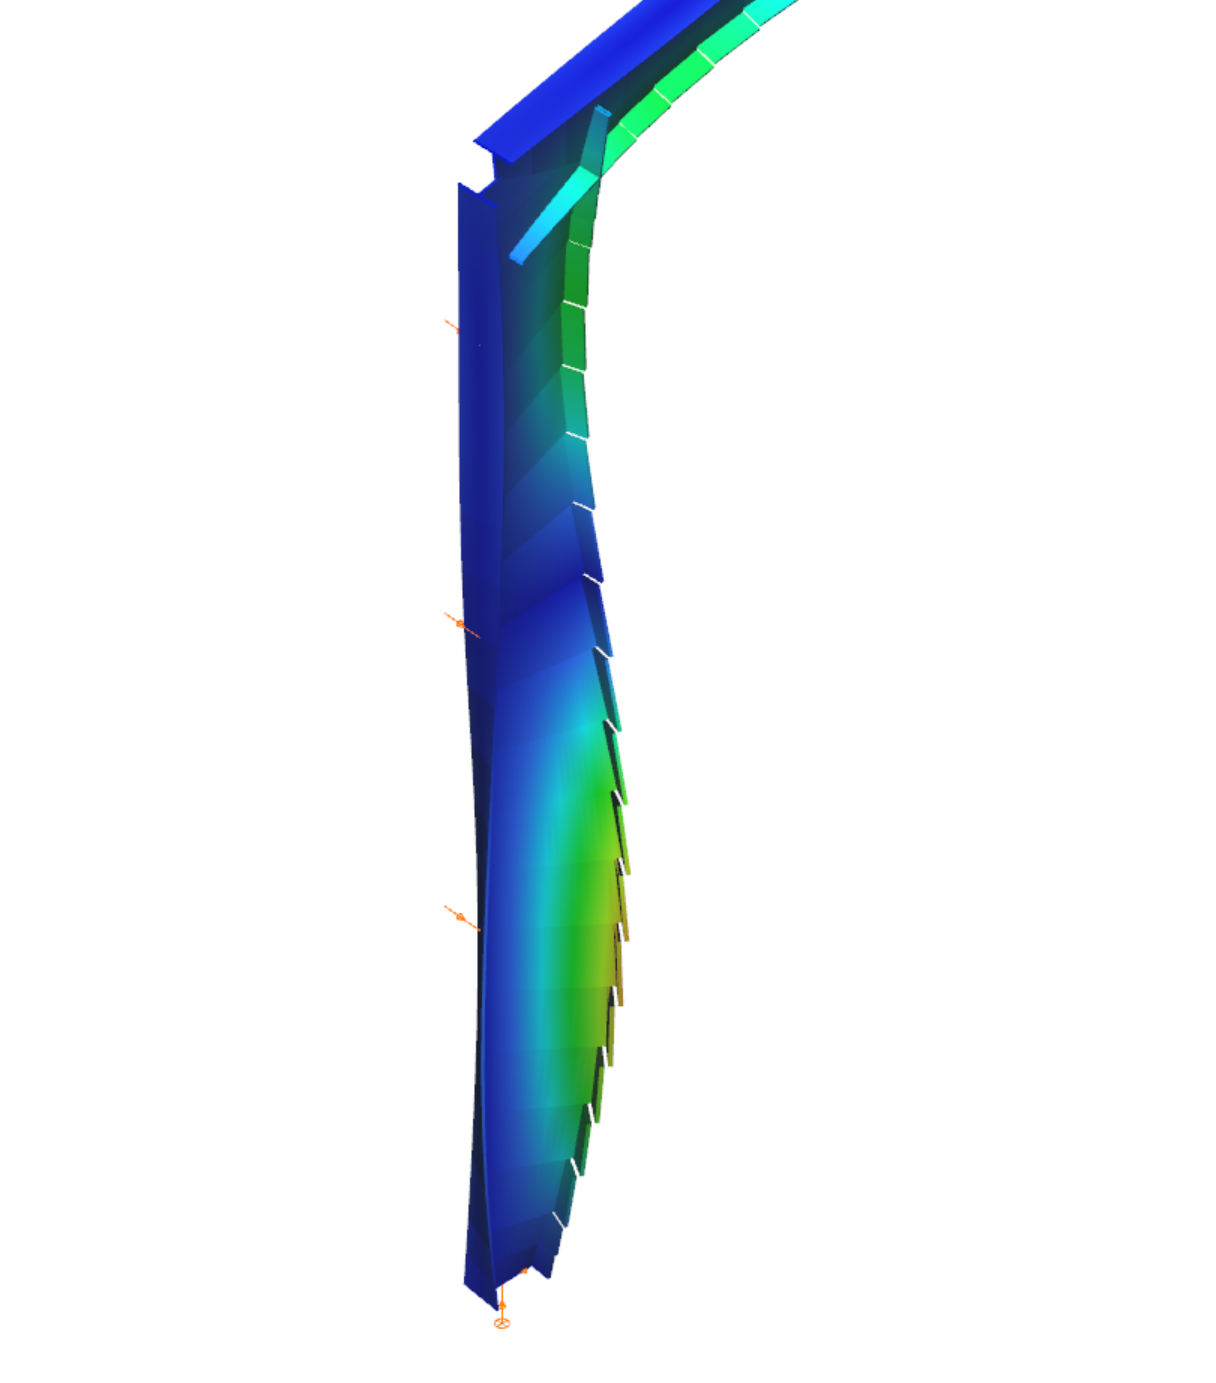
With Consteel’s advanced deformation representation not only the position of the reference line points are calculated and the section is only shown automatically, but the positions of all the decorated points of the section are calculated during a post-process and so it is possible to represent the real deformations. As a consequence it is also visible that the supported points stay in position.
Pangolin not only creates Consteel models for you but can also read and utilize your existing Consteel models. This is what we will look into more detail in this article.
Importing a simple Consteel model to Rhino-Grasshopper
Let’s say you already have a model built in Consteel:
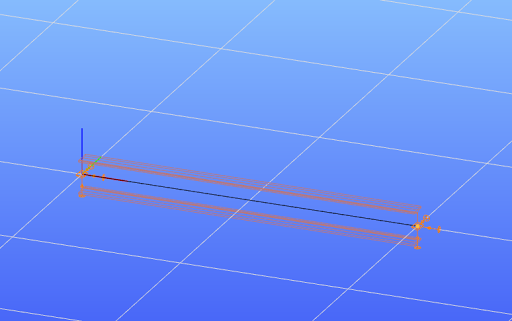
You can either save this model as a .smadsteel file from Consteel, and load it in Grasshopper, or as in this case, use Pangolin’s live connection to read it while both programs run:
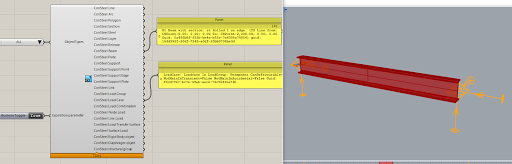
The imported objects can be used in the further Grasshopper definition just like any other object created with Pangolin’s components.
For example when you get a huge spreadsheet with a list of all the loads and their positions on a floor from a partner, or there is just a particular load distribution that is easier to define algorithmically than placing them all manually:
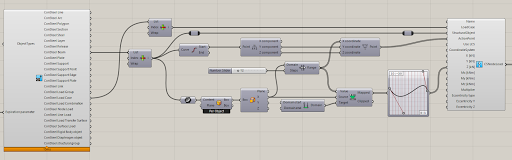
Then you can just send over the newly added objects to the same Consteel model:
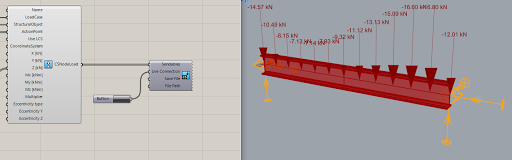
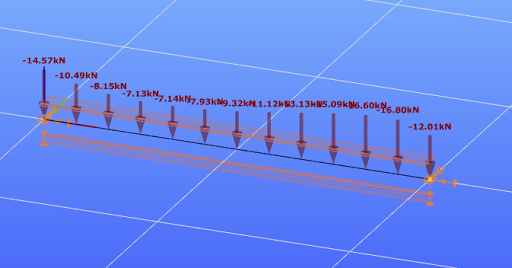
Of course, this was a really simple example.
Now let’s take a more complex Consteel model:
gateIntroduction
IFC is a global standard for data exchange in the building industry. It is widely used for sharing models independent of the software the original model was created. It is of course possible to import an IFC file into Consteel too.
How it works
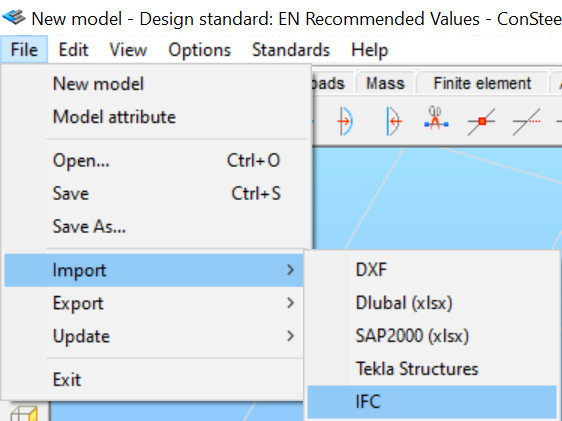
IFC import can be launched from File/Import/IFC
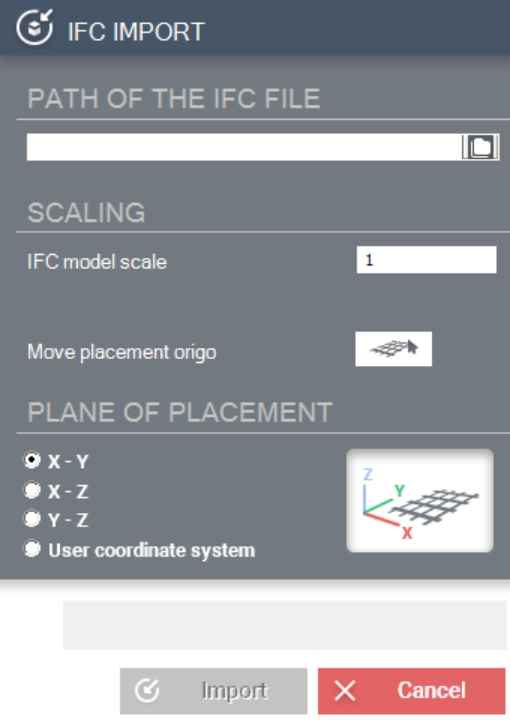
On the IFC import dialog the path needs to be defined for the modell you want to import. Scale and plane of placement can be set also.
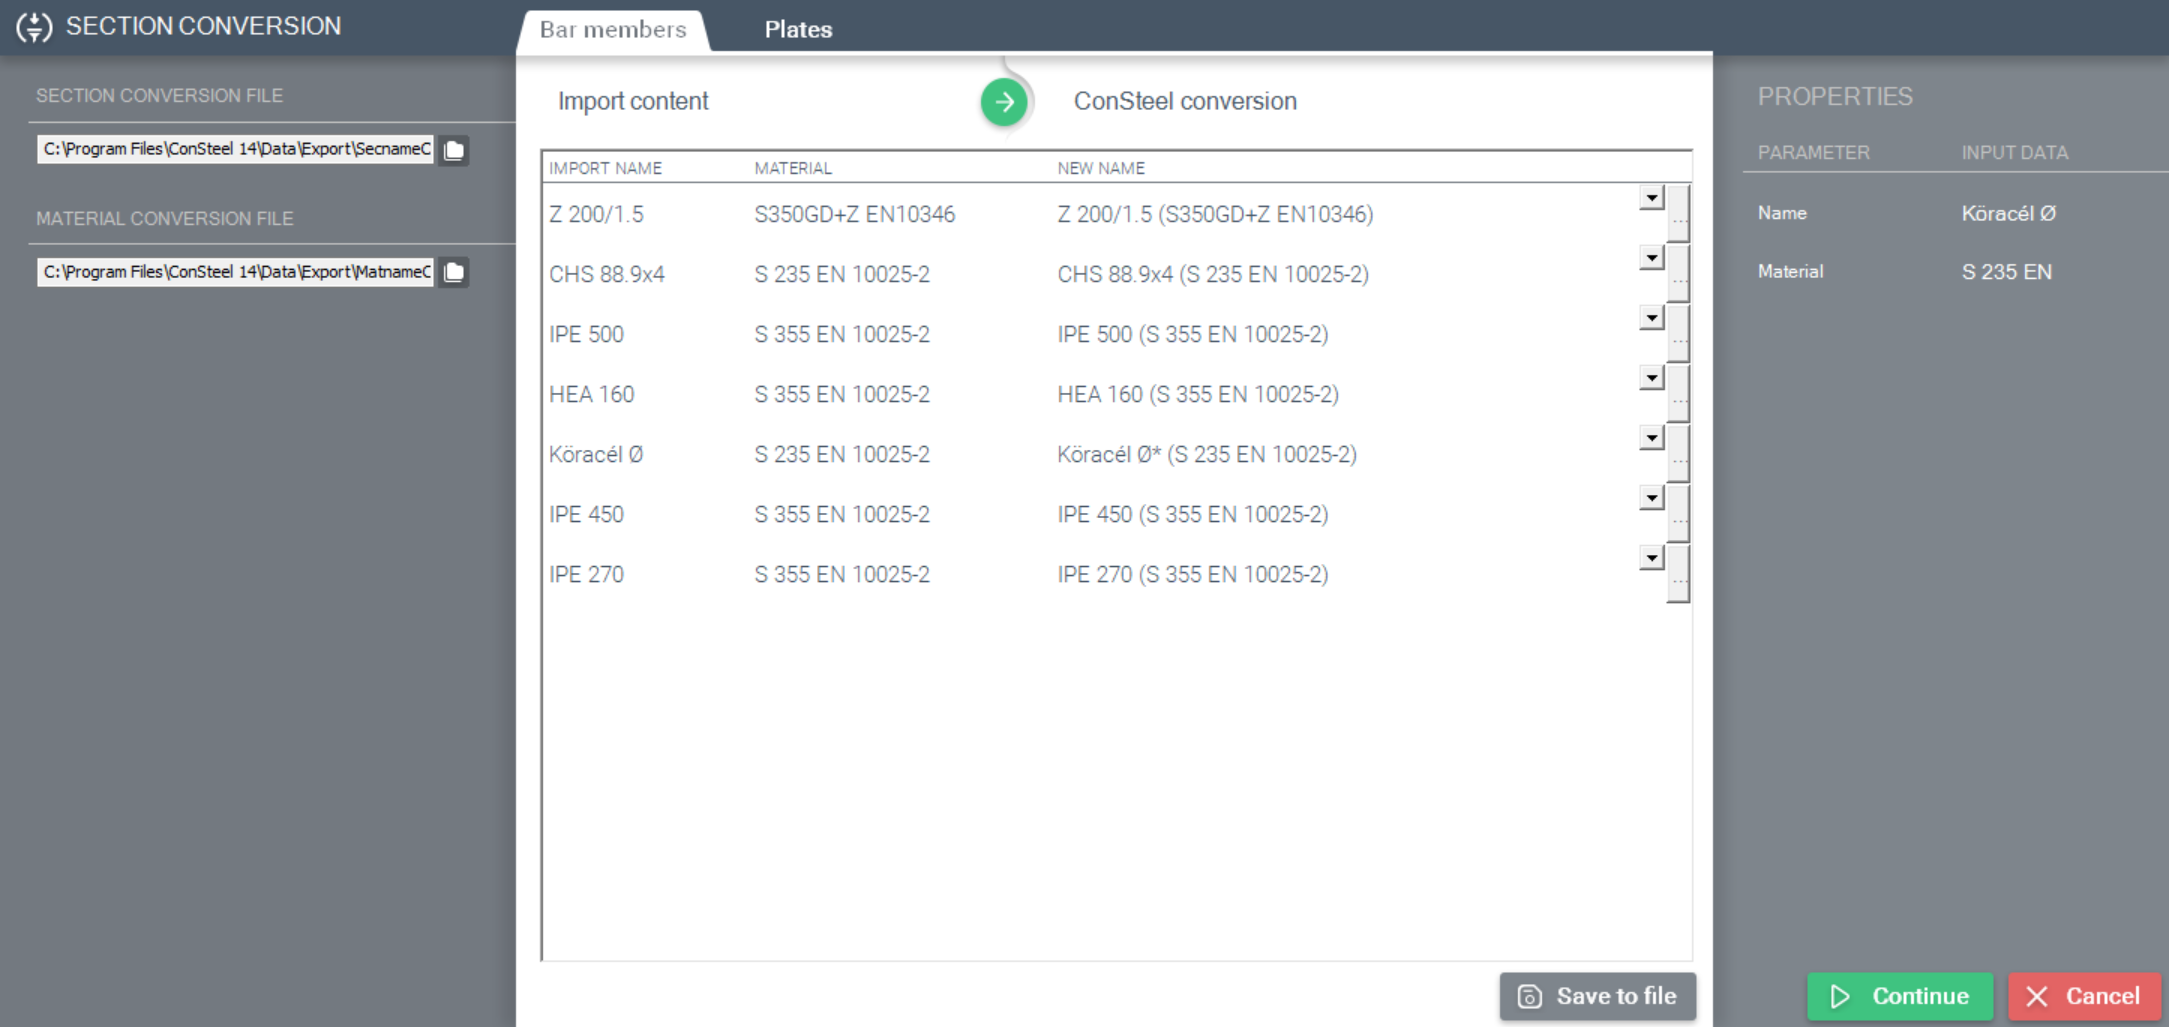
First step of import is the assignment of sections and materials used in the IFC file to the sections and materials of Consteel database. Assignment is done based on pre-defined conversion files which contain the most common cases. If the assignment can not be done automatically, New name cell will be empty. You can either select the necessary section from the drop-down if it was already loaded int the model or click on the … and load/create the section you need.
Introduction
In Consteel there is a possibility to perform a model check on the structure to reveal modelling errors. This model check or diagnostics can be separated to First and Second level model diagnostics.
How it works
The First level diagnostics runs automatically before starting the analysis. It contains two types of checks. First a quick check is running which verfies the minimum conditions of creating the finite element mesh. The second one is a geometrical check performed on the generated finite element mesh verifing for example if the loads and supports are actually on the structure or if there are overlaps between bar or surface elements.
The Second level diagnostics can be initiated manually at any time during the modelling stage to examine the current state. The function can be launched by clicking onView/Diagnostics…button. It starts also with the same quick check as the first level. Then a basic check is running examining e.g. too small distances between members or unproperly supported model parts.
It is recommended to perform second level diagnostics after the modelling of the structure to reveal errors coming from inaccuracies of the modelling. After these errors had been fixed, it is OK to proceed to the analysis, which will automatically trigger the first level diagnostics. If it still reveals model errors, it is easier to handle them if all of the problems from second level diagnostics had been fixed.
Diagnostic messages
There are two kinds of diagnostic messages:
ERRORS: They make the calculations impossible or meaningless to execute so the detected errors stop further calculations.
POSSIBLE ERRORS: The warnings allow the calculation to run but they can influence the results.
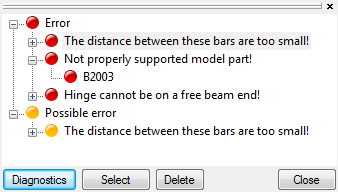
By clicking on any of the object name in the tree structure and pressing the SELECT button, the selected object will be highlighted in the model graphical surface. The selected object can be erased by pressing DELETE button, or it can be modified with the regular geometric operations.
Tutorial video
To see the use of the diagnostic tool, please watch one of our earlier tutorial video below:
gateIntroduction
The effects of the behaviour of the joints on the distribution of internal forces and moments within a structure, and on the overall deformations of the structure, should generally be taken into account, but where these effects are sufficiently small they may be neglected.
Classification
In the case of elastic analysis, joints should be classified according to their rotational stiffness. The joints should have sufficient strength to transmit the forces and moments acting at the joints resulting from the analysis. A joint may be classified as rigid, pinned or semi-rigid, according to its rotational stiffness, by comparing its initial rotational stiffness Sj,ini with the classification boundaries given in EN1993-1-8 5.2.2.5. In the case of a semi-rigid joint, the rotational stiffness Sj corresponding to the bending moment MEd should generally be used in the analysis.
Calculation of joint stiffness
Consteel Joint calculates the Sj,ini initial stiffness of the joint, the Sj,sec secant stiffness for the actual loading and determines the classes of stiffness and strength (last one for plastic analysis).
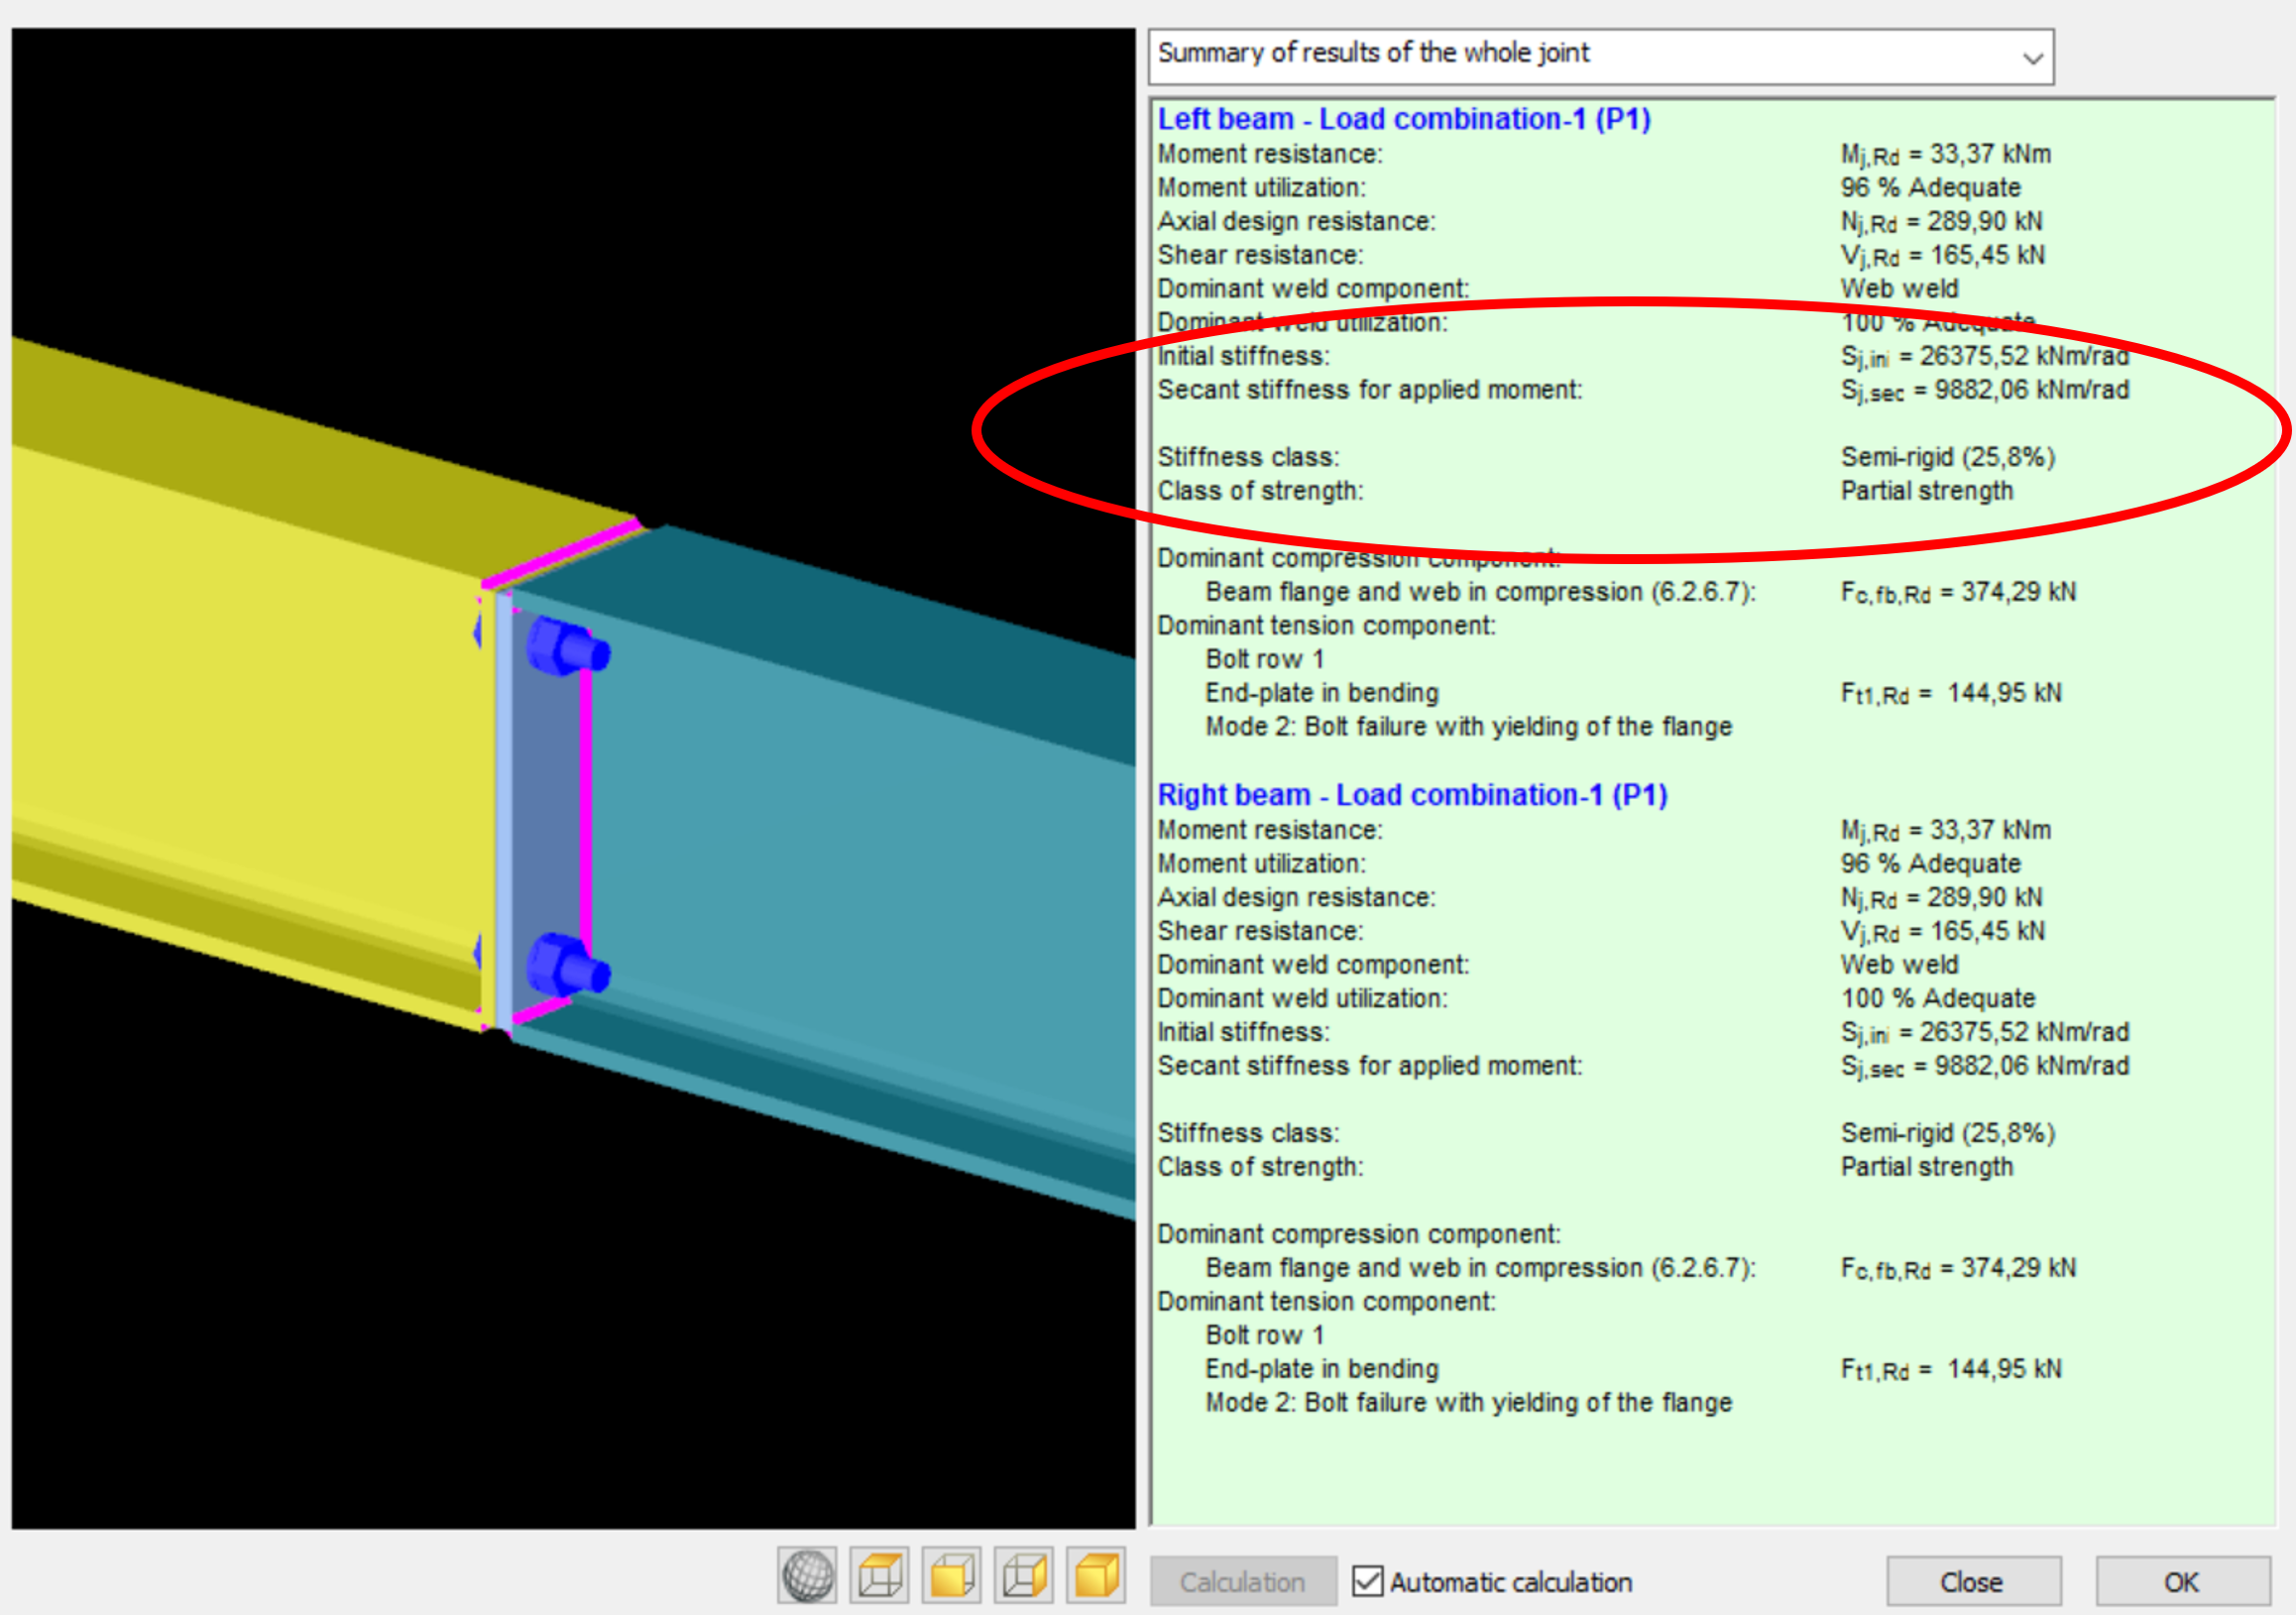
Sj,sec is equal to Sj,ini when MEd does not exceed 2/3*MjRd (EC3-1-8 5.1.2. (3) ), otherwise it is calculated.
Automatic consideration of connection stiffness
gateIntroduction
In the last years, freeform architecture became more and more popular. A variety of complex geometric shapes are used for the facades of buildings, which brought the demand of new, innovative tools and solutions for modelling of these structures too. In Consteel we have developed such functions to make the engineers’ work easier.
Section orientation
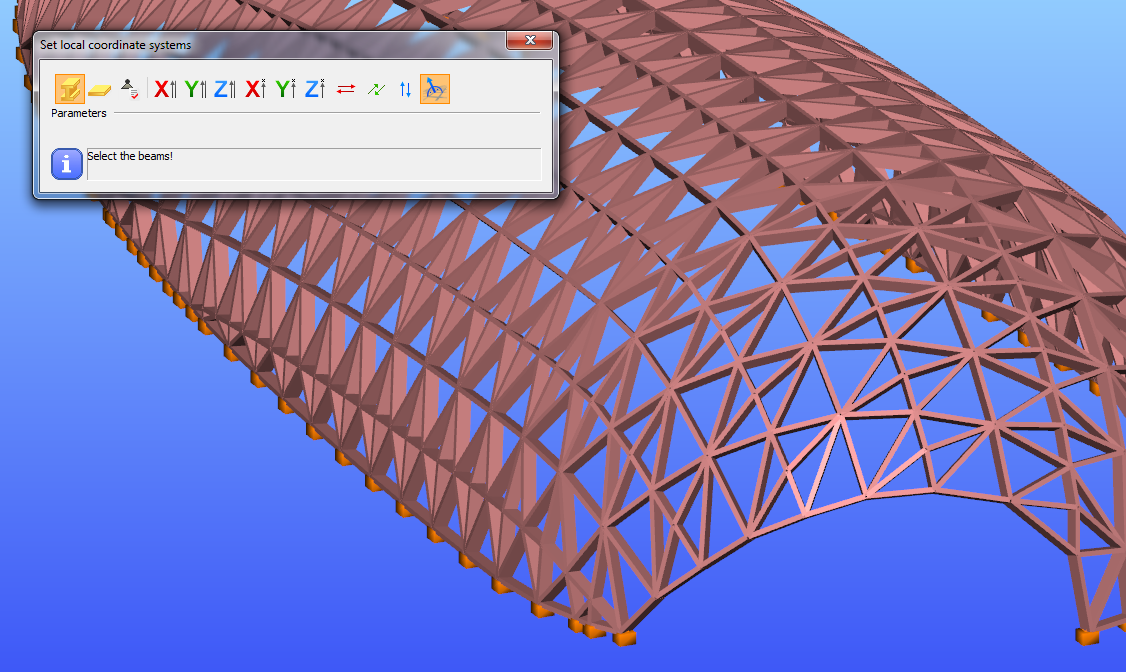
Orientation of the sections is always a problem. We have implemented a tool, with which the rotation of the sections can be done automatically. Sections can be rotated perpendicularly to the surface of the freeform shape of the structure. Z axis will be perpendicular to the surface formed by the connecting beams.
Load transfer surfaces
Covering a freeform structure with load transfer surfaces -like in the picture below-manually, would take a lot of time and effort. Our tool for multiple load transfer surface placement gives you a quick, easy and effective solution for covering your freeforms.
gate